.png.279748a58a2b862b7aa5f3b84126e232.png)


jlempen
-
Posts
125 -
Joined
-
Last visited
-
Days Won
1
-
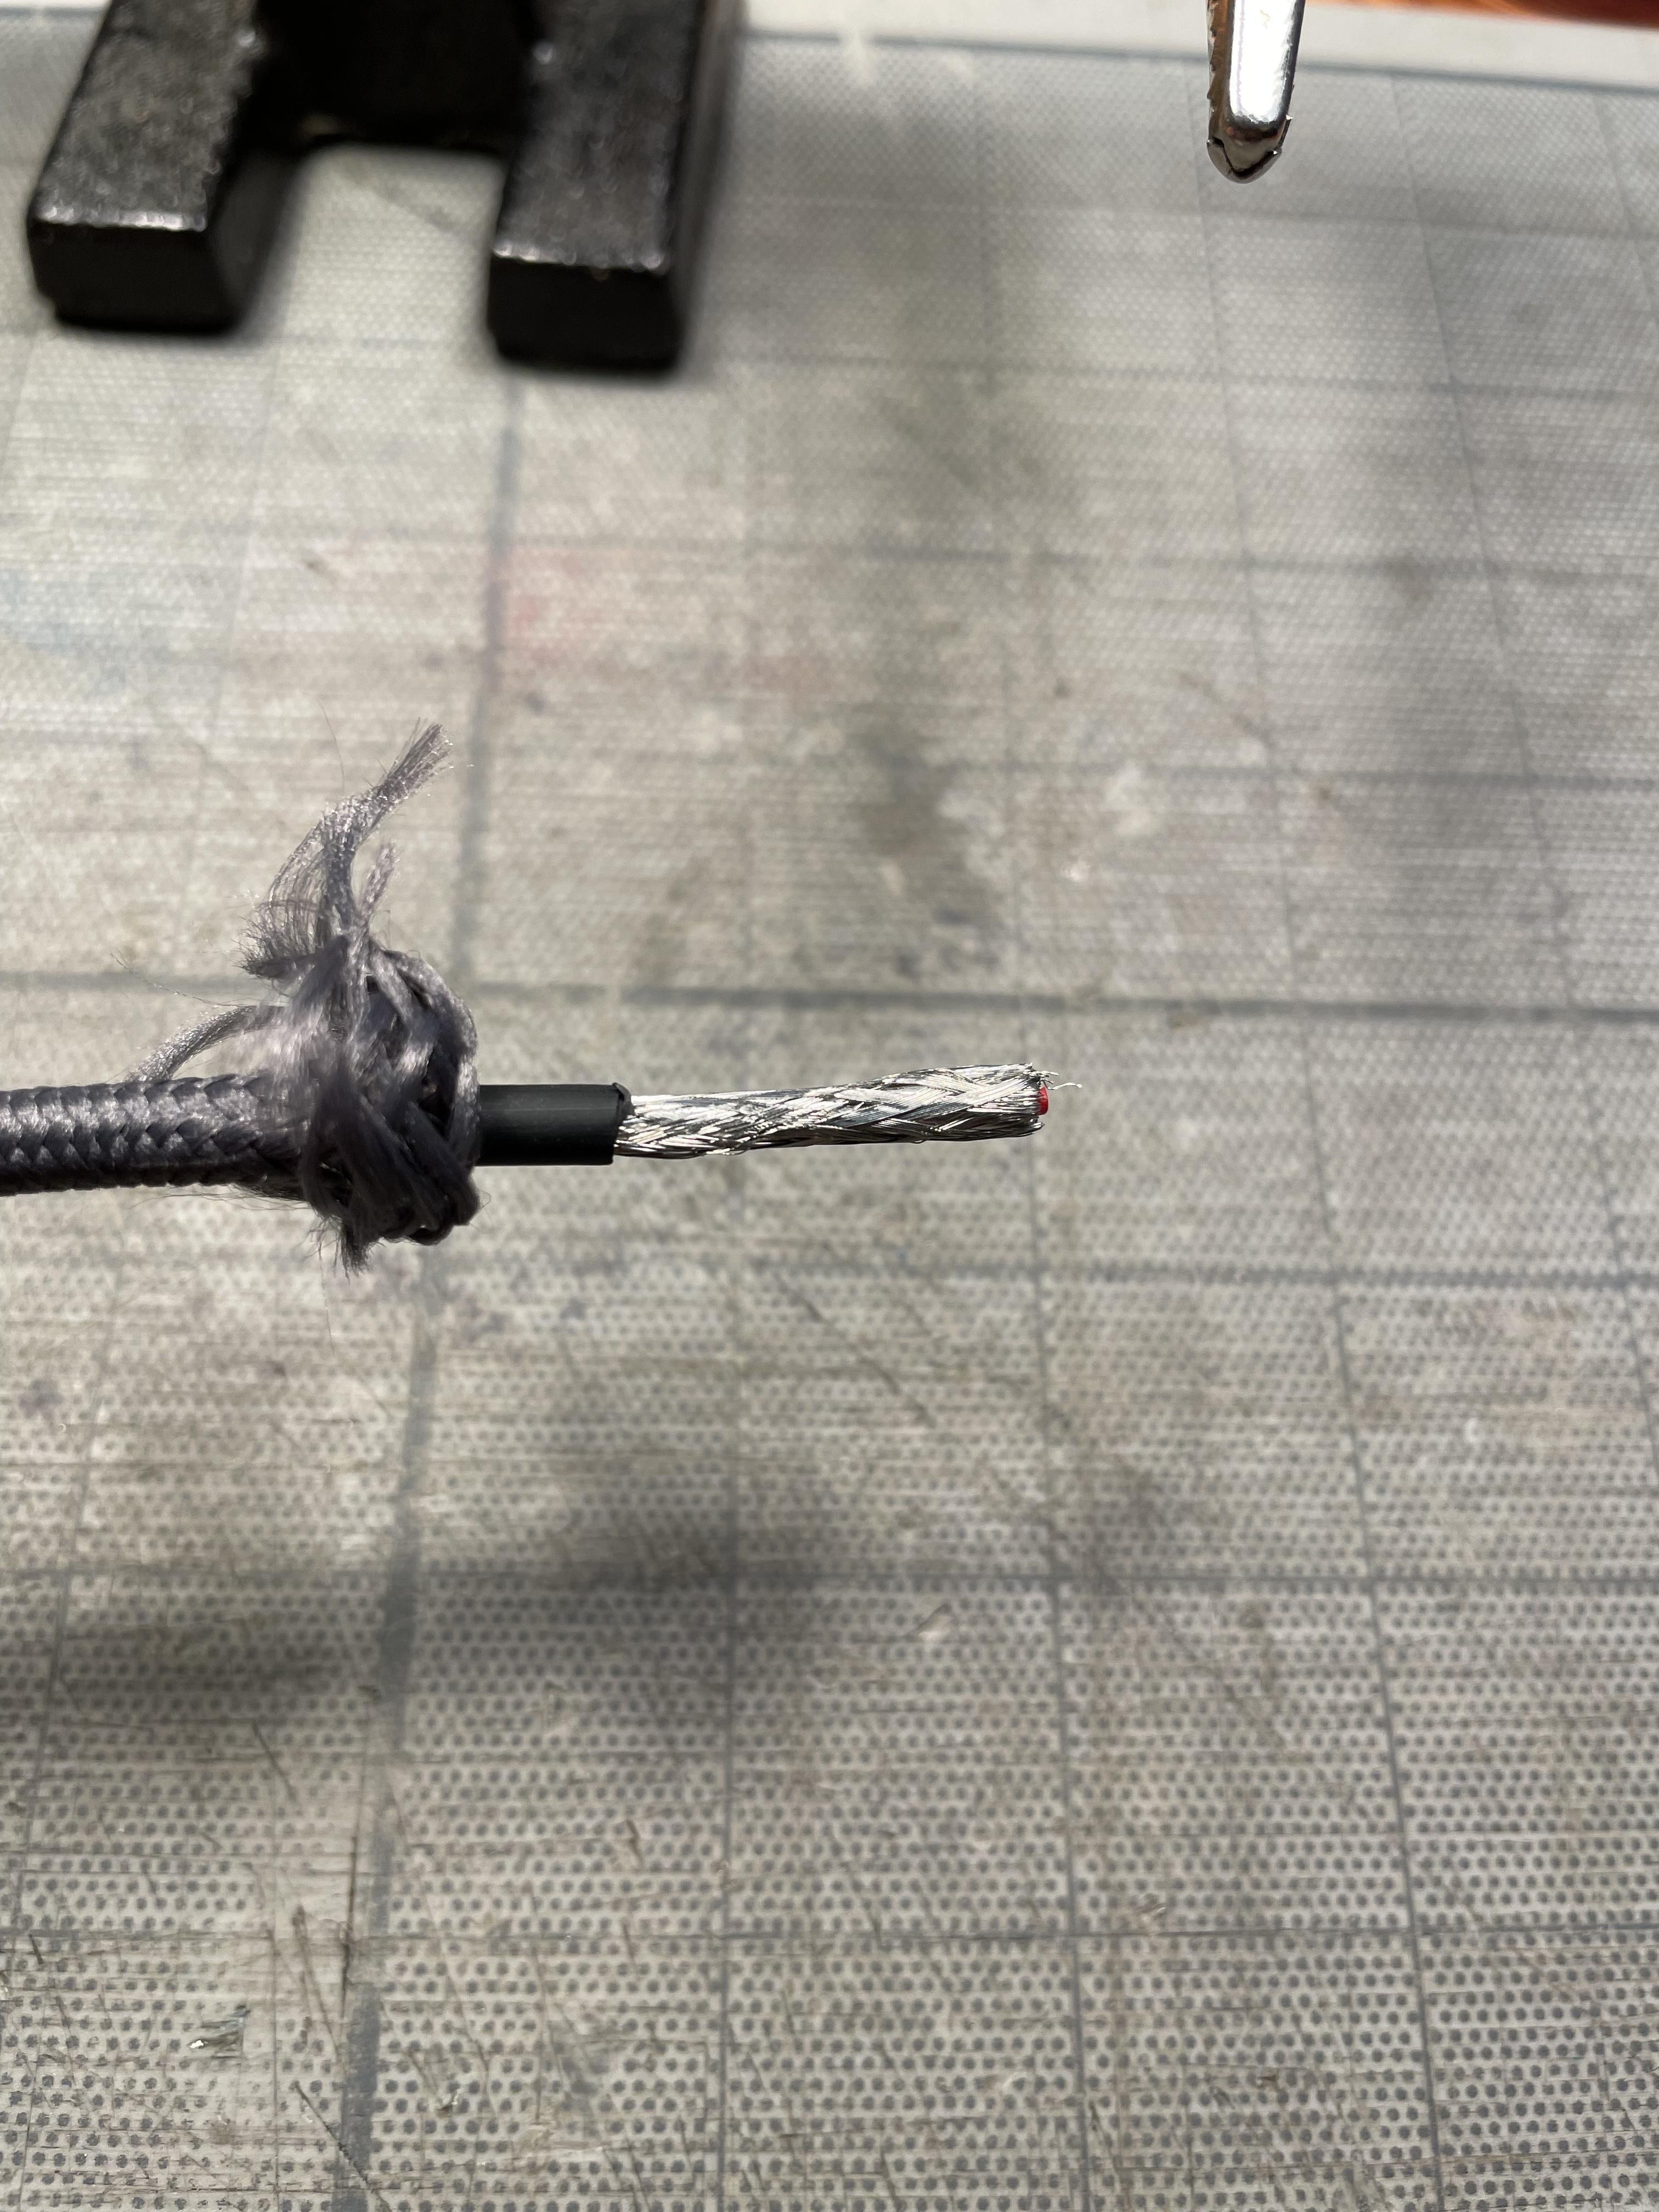
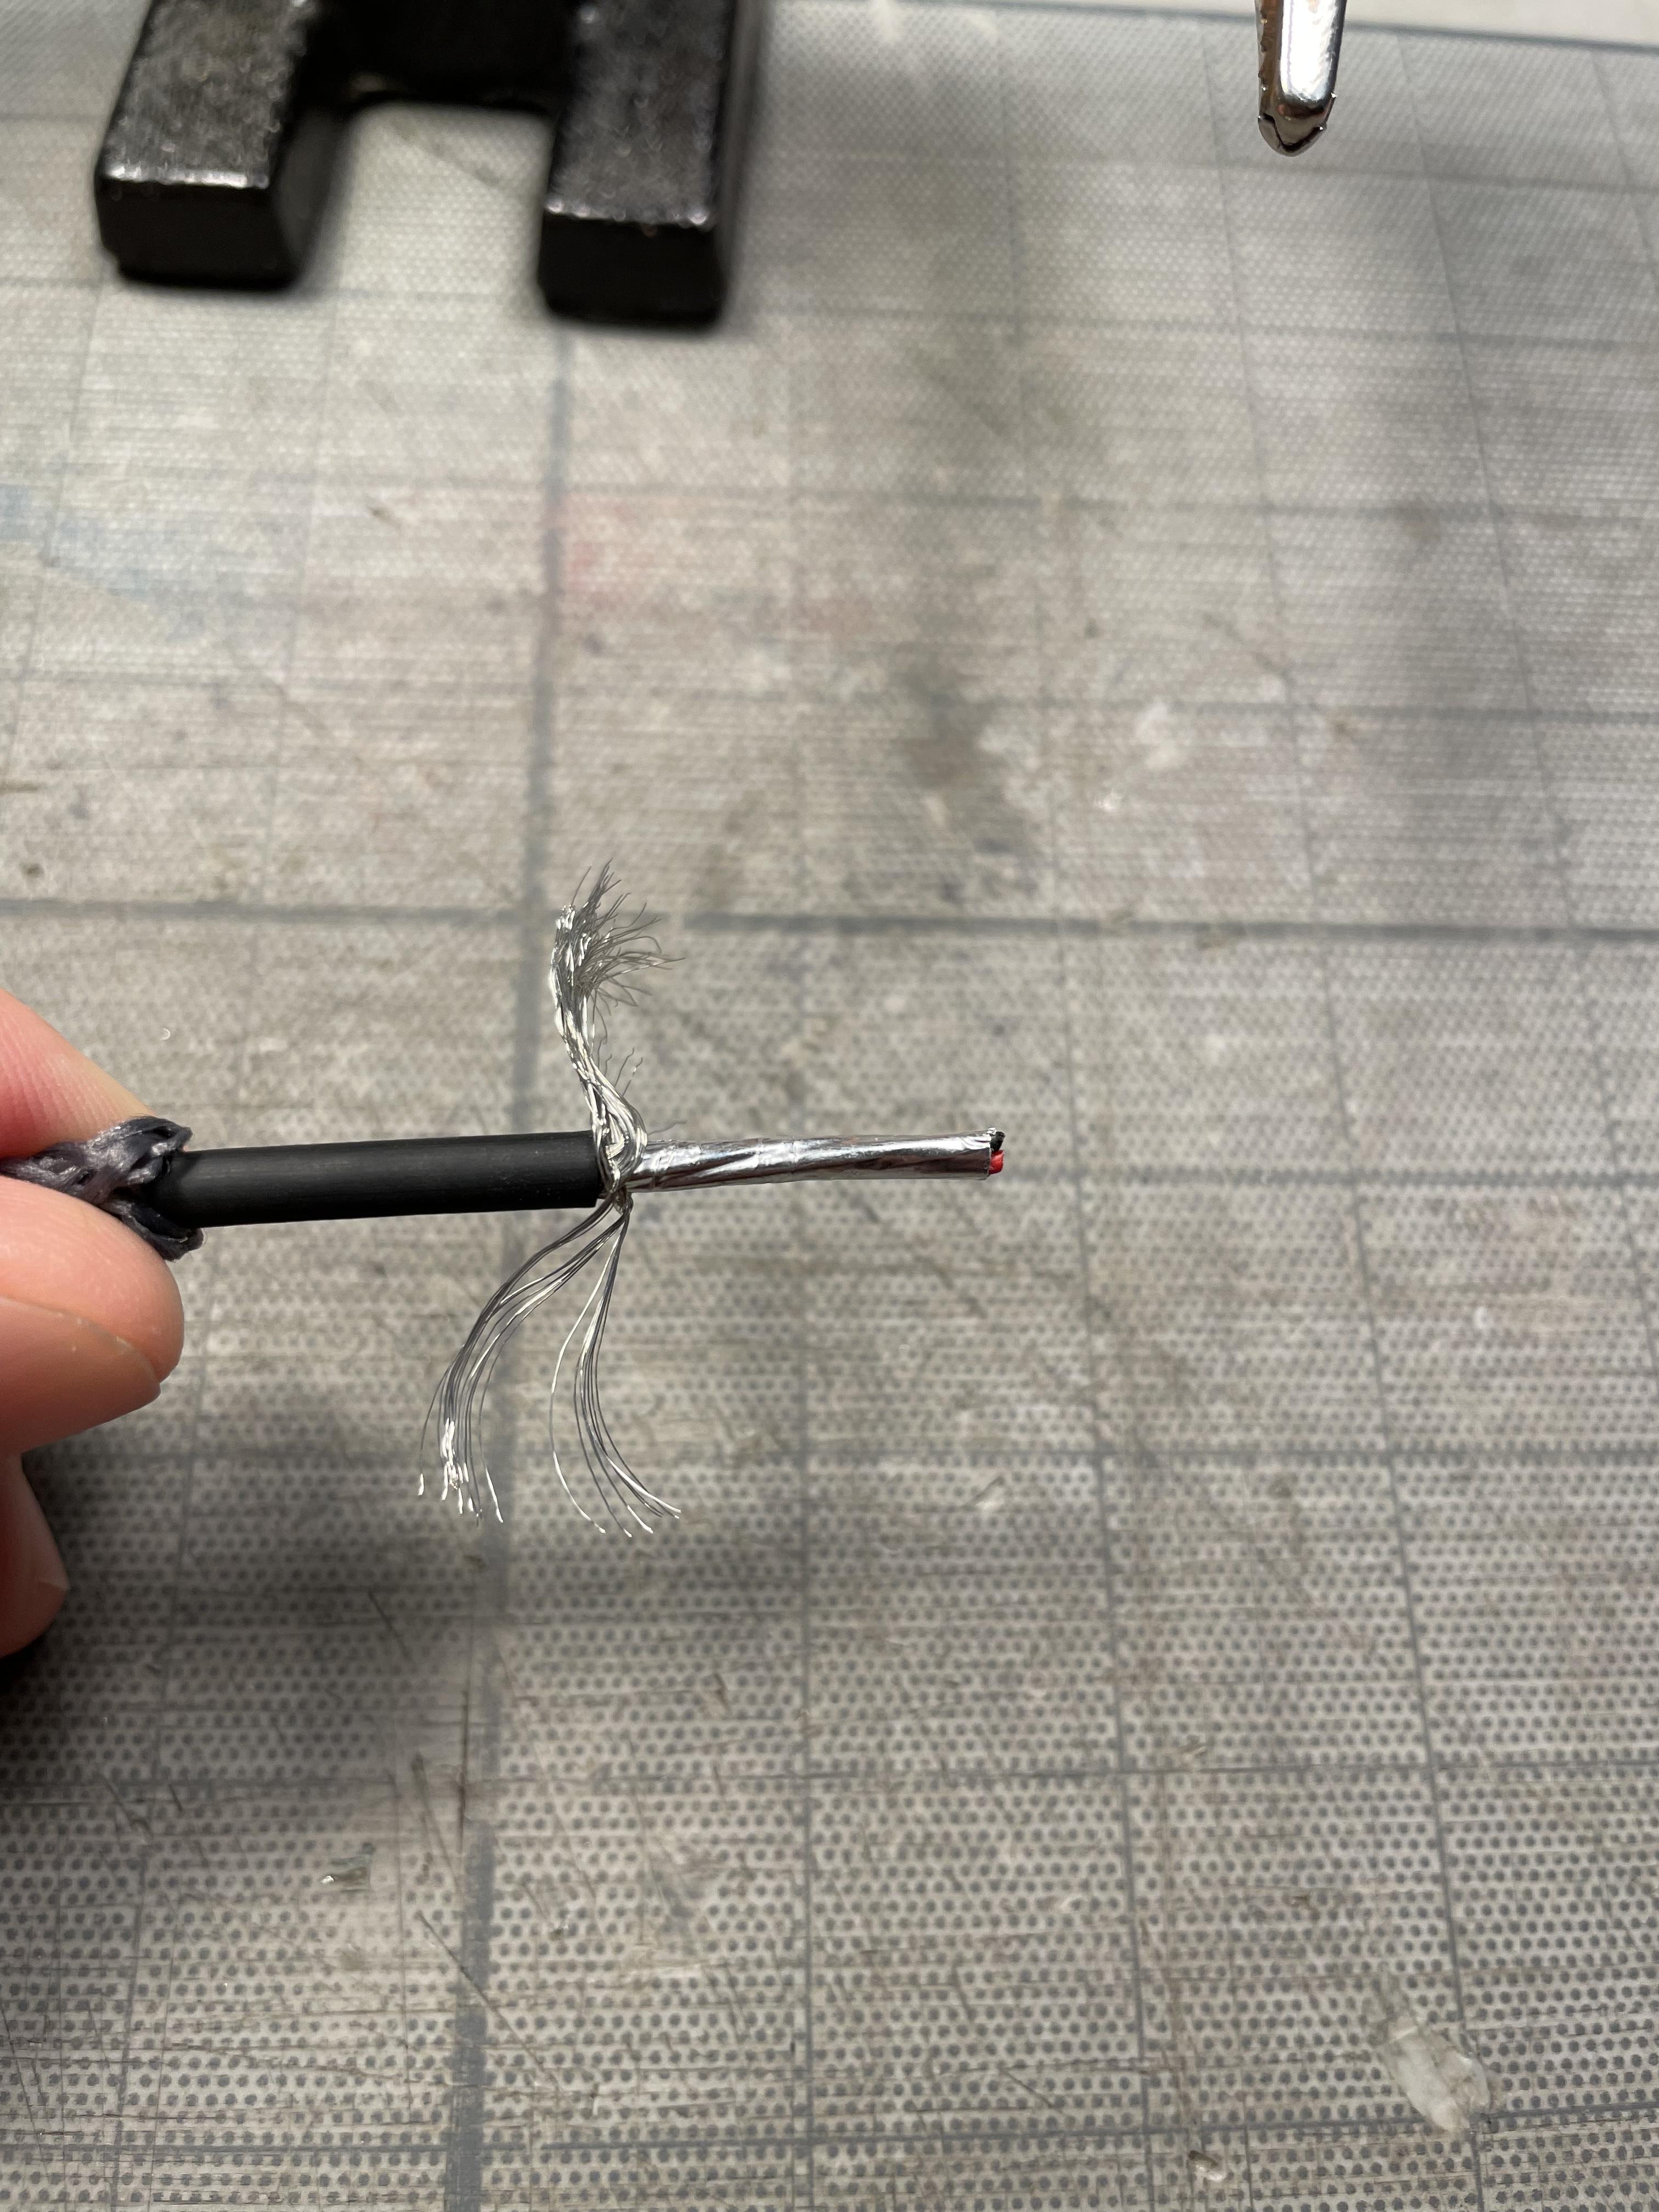
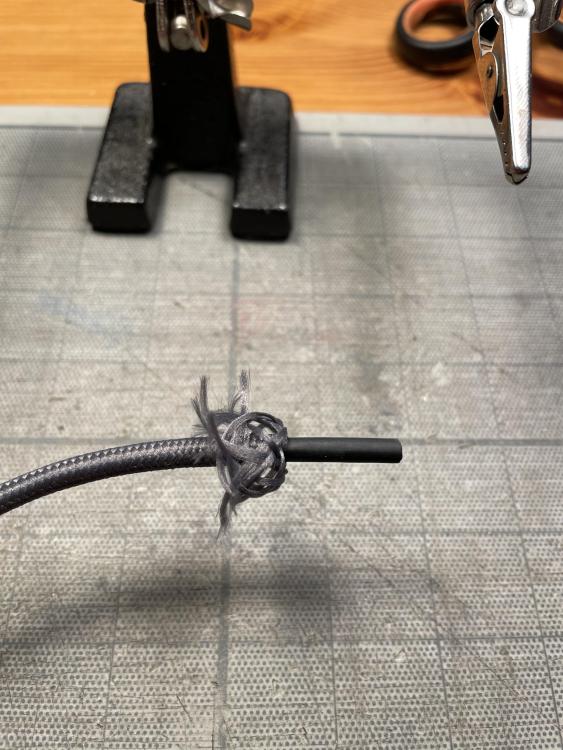
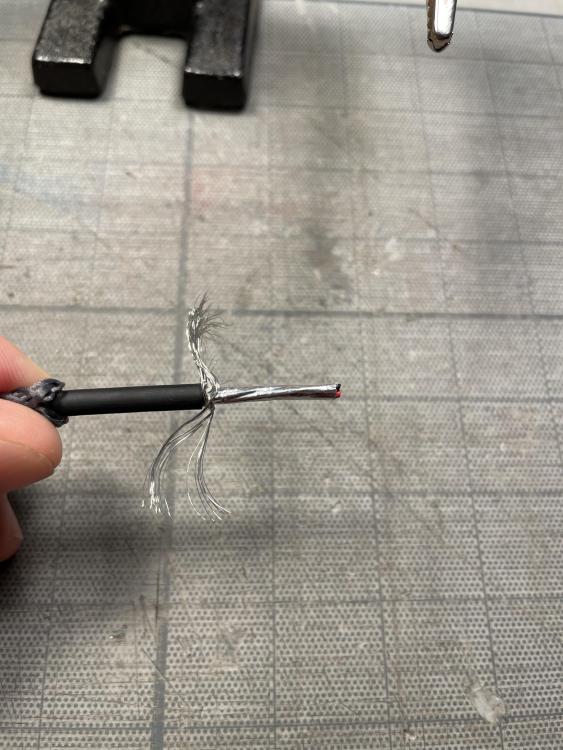
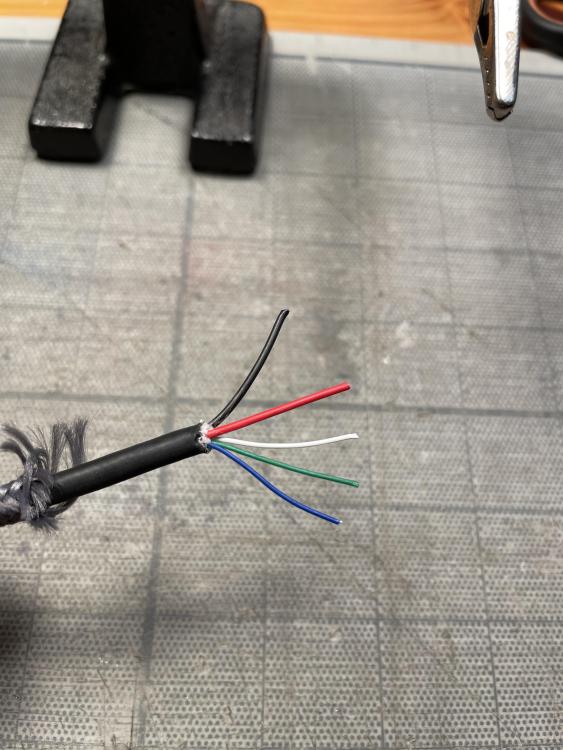
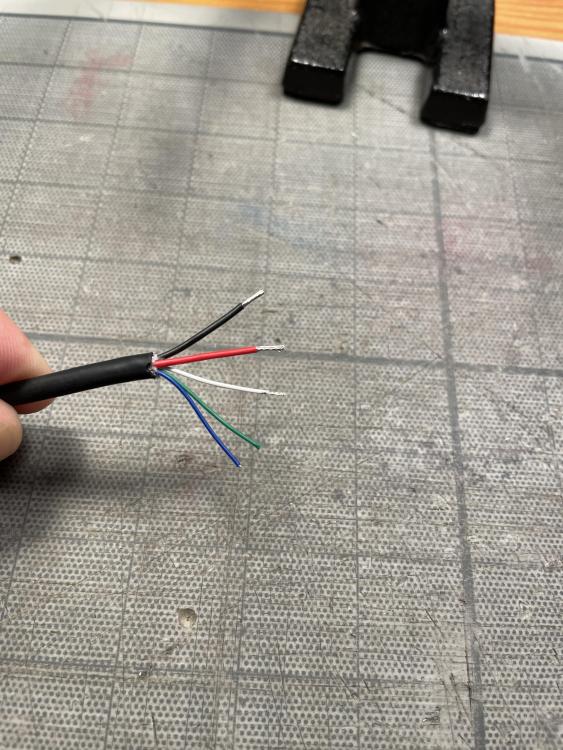
So I took the cheapest and widest available USB-C cable I could find, the $7.99 Ikea Lillhult USB-C to USB-C. This cable is rated for 3A and 480 Mbps. Edit: I could've gone even cheaper with the $6.99 Ikea Lillhult USB-A to USB-C. The specs rate it for 3A and 480 Mbps as well. Stripping the gray knitted textile braid reveals a normal cable with a diameter of approximately 4mm. Stripping the thin PVC jacket reveals a braided shield and stripping that shield reveals another layer of foil shielding, which is easy to cut away. Now we find two approx. 24AWG wires (red and black) for power delivery, and three thinner approx. 28AWG wires (white, green and blue) for data transfer. The wires are easy to twist and solder and the cable's outer diameter of approx. 4mm fits nicely in a Hirose connector, as well as a Rean or Switchcraft TA4. The rubber boot of the Switchcraft would need to be cut a bit shorter to accomodate the 4mm cable. I don't think it would be easy nor practical to keep the gray knitted textile braid, as it strips away very easily while handling the cable once the USB-C connector was cut off. Perhaps taping it down or securing it with 5mm of shrink tube while stripping and soldering the wires could help.


-
Necrobumping this thread as I'm currently looking for such a cable. Audio star quad cables are either a bit too thick for the Hirose and TA4 connectors (Gotham GAC 4/1, Mogami W2534, etc.) or the wires are only 26AWG and thus a bit too thin for the current the SD 833 might draw when fully loaded (Mogami "Mini Quad" W2893, Sommer Cable Cicada 4, etc.). After some research, I decided that butchering a cheap USB-C to USB-C cable is the easiest way to go. According to the USB-C specification, "All USB-C cables must be able to carry a minimum of 3 A current (at 20 V, 60 W) but some can also carry high-power 5 A current (at 20 V, 100 W)." USB-C cables have two larger wires for power delivery and a few smaller wires for data and clock signals. Exactly what we are looking for.
-
I know I'm necro-bumping this thread, but I think I have a few ideas to share on this topic 🙂 Below you'll find a simple schematic for a passive, popless mic mute circuit. It's a very simple design needing only a resistor, a capacitor and a switch. This circuit is a mute switch, but can be transformed easily into a push-to-talk circuit by swapping the switch with an ON-(OFF) pushbutton. I replaced the 100uF C1 capacitor with a 470uF capacitor which gives better attenuation. This circuit has already been mentioned here, with a nice comment from Larry Fisher: As for using an Aux Input of the Mixpre-10T to provide plug-in power and a preamp for an external talkback electret mic, I discovered that there's actually no need to assign the Aux Input to a track (track 9 or 10) of the Mixpre to use it as a talkback mic. When the Aux Input is configured as a Mic level input, it can be assigned to any L, R, X1 or X2 output and combined with the prefader boom ISO track to send a feed to the boom operator. With this simple hack, there's no gain setting available, but the default Aux Mic Input gain seems to be just about right for this purpose. And you won't lose one of your mix tracks. Another, perhaps more complex but also more powerful setup would be to use a cheap and tiny electret mic preamp such as this one https://www.adafruit.com/product/1063 to power and amplify the talkback mic in order to feed it directly at line level into the Mixpre Aux Input configured as a camera return, which provides a gain setting. And there's an adjustable gain trim pot on the electret mic preamp as well. Or mix the line level talkback signal directly into the boom monitoring transmitter through a simple passive mixer circuit needing only two resistors. Of course, the talkback box would not be passive anymore, as the little electret mic preamp wants 2.4-5.5V which could be provided by three AA batteries.

-
Thanks for posting this, Valentino!
-
Hey Callou, Both SD cards are formatted as UDF filesystems, which means that they are mounted read-only, like a CD-ROM disk. Which explains why Wave Agent throws an error when you hit save... There's no reason that once copied to the hard drive, files recorded with the R4+ would behave differently from those of other recorders. And I've used Wave Agent with files recorded on every software revision of every Sonosax digital recorder ever released and have never had more trouble with those files than with files from my SD recorders, for instance. But there's two things that cause problems with Wave Agent, at least on the Mac platform: - Batch renaming files from Sonosax recorders will get you in trouble if you use a slash "/" in the scene name. SX recorders use the slash "/" character by default in the scene name, e.g. "34B/2", European style. As the slash is used as a path separator in almost every operating system and especially in every software development environment, this will cause all kinds of problems. I've just tested it again on my copy of Wave Agent v1.20 on macOS 10.12.4. WA throws an "Error occurred during process." error and the first file of the batch process simply vanished from the Finder window.... - Sometimes the "Processing" progress bar doesn't appear in the user interface while processing multiple files. I've seen this on several versions of OSX and with several revisions of Wave Agent. The processing is done correctly, but you don't get the progress bar and have to guess when the batch process is done before closing the window/app. This happens to me with files from any and every manufacturer.
-
Hey Ivan, The retrofitting was done in a pinch. On one of my 7506's I wasn't able to slide the new headset cable through the stock strain relief boot, so I simply used some heat-shrink tubing as a strain relief. There's a plastic strain relief loop to secure the cable inside the cup. This works with the new, thicker headset cable as well, but it takes some brute force to push the new cable firmly into the loop. There's no need for the zip-tie included with the new cable. The bare leads of the cable are pre-tinned and the soldering inside the headphones cup is very easy. I think it took me around 15 minutes per set to swap the stock coiled cable with the Remote Audio headset cable. After two weeks working on set with the system, I can say that it's a terrific solution and I'm very happy with it. My boom man David is glad to hear me loud and clear at last, even when I'm relaxing on my chair. The sound quality of my talkback and slating has improved tremendously thanks to the headset cable. I'm not quite sure I like the Remote Audio coiled cable, though. It's a very tough cable, but it's heavy and stretching the thing takes quite some strength compared to the stock Sony coiled cable, I can feel it pulling down on the left side of my headphones, which is kind of disturbing. I think I'm gonna swap the coiled section after the small microphone box with some Mogami Mini-Quad cable to see if I'm more at ease with a light and straight cable. BTW, the retrofitting instructions on Remote Audio's website are written for their modified 7506 high noise headphones, but the instructions are roughly similar for the stock 7506's, you'll figure it out easily. Attached you'll find the missing PDF. Cheers, Jürg Remote_Audio_Headset_Cable_Assembly_Instructions.pdf
-
Hey all! As I'm currently retrofitting a few Sony MDR-7506 headphones with the Remote Audio Headset Cable, here's the rather unusual pinout for the TA5 connector Remote Audio use on their headsets and headset cables: 1 – Headphone Right 2 – Headphone Left 3 – Headphone Common 4 – Microphone Ground 5 – Microphone Audio (and 5V, if chosen) Cheers, Jürg
-
On my side I found out that you really need to reset the machine's configuration, as well as the user setups after the update. If you don't, the UI of the machine will behave rather erratically... This update v2.3 seems to fix all the bugs I reported after two months shooting with the R4+ on my cart. The two main bugs I reported were that the timestamp of the files on the card in the SD2 slot was inaccurate and that the Rec and Warning Beeps in the Headphones would play out full power when disabled in the UI.
-
Hey Olle! If my memory serves me well, it is Java code injected into a HTML container, which makes the code quite huge at the moment. The AD8+'s web interface is pure Java and the new incarnation of the R4+'s web interface will be pure Java as well. But I could be wrong, I'll ask that question to Sonosax's software guru...
-
Yes, you can. The R4+'s web interface in its current form (it is being redesigned actively as we speak to reflect the design of the AD8+'s web interface) actually mirrors the current state of the machine. So you may change track arming, track names, project name, scene and take numbers and the note for the upcoming take, as well as for the take being recorded. If you want to change metadata for the last recorded take, you have to manually load the last take into the player mode on the machine itself. The web interface will then show the metadata of that take and you may edit it to your liking. This is very likely to change with the new incarnation of the web interface, which will allow editing more or less every parameter of the machine.
-
Hey Neil Mc It was quite cold, we had a few days shooting in sub-zero temperatures, but the conditions weren't that extreme. However, I had a strange shooting day in Singapore in January where we were shooting in extremely damp and hot weather and during one of those frequent flash thunderstorms, we suddenly followed someone into a huge industrial freezer at -18 degrees centigrade while filming. We stayed there for 15 to 20 minutes and got out again, still shooting. My R4+ kept rolling without a hitch even with the extreme condensation - I could barely hold my boompole as it was dripping with condensation - whereas the lens on the camera (and my reading glasses as well) became unusable within seconds of walking out of the freezer... Even in sub-zero temperatures in the Alps, the R4+'s touchscreen stayed responsive all the time, but it would be difficult to use it while wearing gloves. Maybe a pair of thin, iOS compatible gloves would work, I'll have to test that. Cheers, Jürg
-
Hey Richard, Great to know, thanks. Our DIT used DaVinci as well, and I haven't had any feedback from the post crew until now, so your comment is kind of a relief. Hey Olle, Well, one of my Tentacles died after a few days out in the freezing cold, but I couldn't tell if it was due to temperature, to humidity on some foggy mornings or if it would've died anyway because of a hardware fault... I quickly sent a mail to Tentacle Sync's excellent service department and have had a shiny new Tentacle delivered by UPS on location a few days later, no questions asked. Nevertheless, I'm still glad I bought a handful Tentacles back then when they were calling for funding on Indiegogo. At that price, it's always good to have a spare or two.
-


-
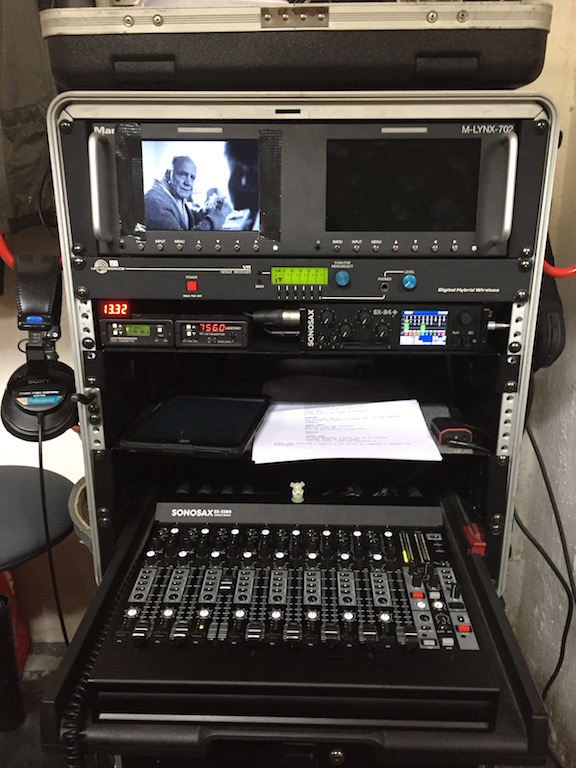
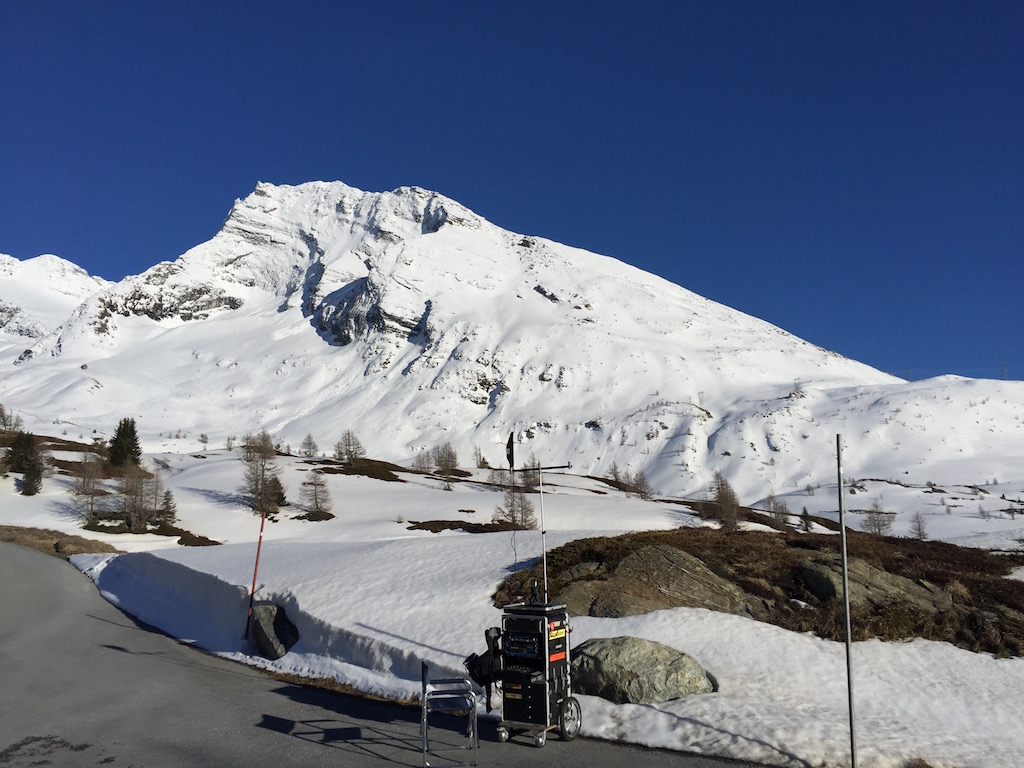
Hey all! I just finished 37 days shooting a drama in the Alps in very cold and foggy weather with the SX-R4+ as my cart recorder and I'm very pleased with the results. The R4+ was fed with six ISO channels through the analog inputs and four mix tracks through the AES inputs, the ISOs coming in from the direct outputs and the mix tracks from the AES outputs of my SX-ES84. Recorded up to 10 tracks 48 kHz 24 bits on the R4+ without a hitch on cheap SanDisk Ultra 16GB 80 MB/s SD cards in slot SD1 and a SanDisk Ultra 64GB 40 MB/s card as a backup in slot SD2. Initially I planned to use the R4+'s Web Interface for metadata input, but finally decided to stick to my MovieSlate 8 app on the iPad Mini because I didn't want to change my whole trusted workflow all at once. I had absolutely no issues with TC, the R4+ and both Arri Alexa Mini cameras were fed 24fps TOD TC from Tentacle Sync boxes and sync stayed within half a frame all day long on every shooting day. Scene, Take and Track Name metadata entry, as well as Track Arming was quick and easy thanks to the programmable shortcuts on the touch screen. I used my mixer for slating and for my Private Line with my boom op and the R4+'s Analog Aux Output to feed my main mix to a Lectro T1 IFB transmitter. As my ISOs and Mix Tracks don't come in through the same hardware interface (analog vs AES), there is a slight constant delay of a few milliseconds between them. I know that there's some latency in any A/D converter, so I guess that the AES A/D board in my SX-ES84 has a tad more latency than the A/D converters of the R4+'s analog inputs, which would explain why my Mix Tracks are a few milliseconds late. That should be easy to fix with an adjustable delay on the R4+'s inputs in a future firmware update. I'm very happy with my new drama cart setup! Cheers, Jürg
-
I just finished a 37 days shoot with Alexa Mini, a Tentacle Sync box on both cameras and a Tentacle box on my recorder as well, the output volume of the Tentacles cranked all the way up. 24 fps. The Minis' TC options set to EXT LTC - REGEN - FREE RUN (there's no PRESET option in the Alexa Mini). Sync stayed within half a frame all day long every day without rejamming the Tentacles on lunch break for the whole shoot. The AC told me we had the latest firmware on the Alexas. BTW, all audio channels were disabled on the cameras, as we recorded a scratch track on a Video Devices PIX and an Odyssey 7. My Mini Lemo 5-pin Audio cable worked great until we decided to disable the onboard audio as we didn't have any use for it.