.png.279748a58a2b862b7aa5f3b84126e232.png)


mastermixaudiomedia
-
Posts
184 -
Joined
-
Last visited
Content Type
Forums
Gallery
Store
Everything posted by mastermixaudiomedia
-

Stefan Kudelski inventor of the Nagra dies at 84
mastermixaudiomedia replied to Chris Woodcock's topic in Current
May this legend Rest In Peace. -
Another cool old console.....
mastermixaudiomedia replied to Philip Perkins's topic in The Daily Journal
NICE!!! -
Another cool old console.....
mastermixaudiomedia replied to Philip Perkins's topic in The Daily Journal
The first "real" console that I got to really explore... when I started as a student at the college where I now have worked for 25 years, this was what we had, a Cetec Electrodyne 2000, 1972 vintage. After she left our hands(to this day I kick myself for not getting a pair of each of the 709 and 712 input modules), she eventually ended up in Texas where she is still making records today, 40+ years later! -
Waiting with bated breath...
-
One mans quest to save Pinball..
mastermixaudiomedia replied to Richard Ragon's topic in General Discussion
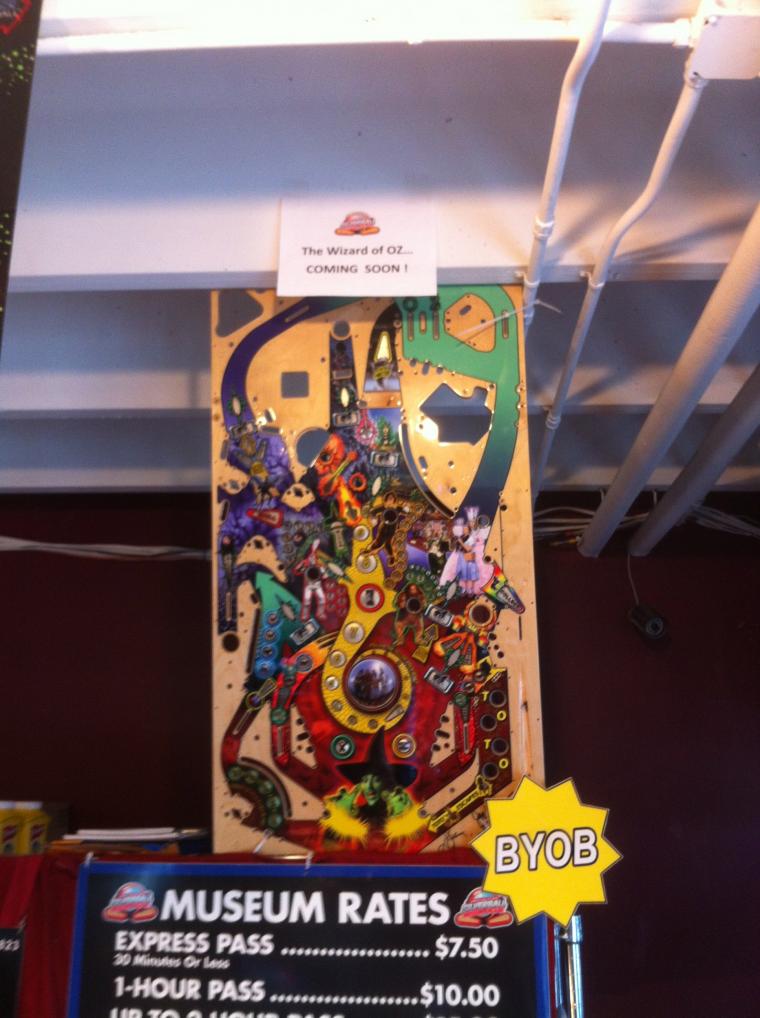
Oh boy, one of my favorite things ever. If anyone is ever in Asbury Park NJ, there is an excellent pinball museum/parlor on the boardwalk called Silverball: http://silverballmuseum.com/ 200+ machines dating from the beginnings through the 2000's... along with some classic video games/skee ball etc. They just reopened a few weeks ago after being hammered by Sandy. I live six blocks away so it seems whenever I have a spare moment I'm in there. $50/mo. VIP membership allows all the play I can handle. As to Richard's comments, looks like I have some research to do... some machines are pretty obvious(Scared Stiff featuring Elvira immediately comes to mind) but I will have to take some second looks. The place in Vegas sounds cool too, gonna have to get there next time I'm in those parts. Edit: Was in Silverball yesterday and look what they are getting in soon... there's gonna be a lot of time spent on this machine by me!
-
Jan, it was great to meet you! Missed the after party and meeting more soundies, went uptown to the Morgan Library after the show with my girlfriend. Was a great look into the process. Was looking for this but could not find... is there a way to otherwise obtain these items? Appreciate the hard work of all involved, the video will surely be a great reference for the RIGHT way to do things... Ken
-
Sure will Jan! Love the flowchart... Looking forward to tomorrow! Ken
-
In. Looking forward to meeting some soundies!
-
Did you get/give anything cool for Christmas?
mastermixaudiomedia replied to Todd Weaver's topic in Current
Got my girlfriend an iPad 2. She got me this(came all the way from Down Under!)... great read so far:
-
audio and Timecode onto a goPro
mastermixaudiomedia replied to hobosoundguy's topic in Cameras... love them, hate them
I'd say the above is yet another worthy T-shirt candidate... -
Thanks for the info Eric, very similar to my breakaway ends for Panasonic AJ-SDC615's(except XLR5F). RED's manuals have no info whatsoever on the pinout, and the REDUSER forum just muddies the waters..
-
Making a breakaway end for a RED ONE(2x TA3M send/TA5M return) for my Nomad. Thought it would be simple but as with most things RED: http://www.reduser.net/forum/showthread.php?55673-TA5-to-mini-jack Downloaded the manual... not a whole lot in there. Looks like there will be some poking around involved...
-
Funny this subject came up as I was just looking in the back of the mic cabinet and pulled out an AKG D900! Have a C451/CK9 combo here from back in the day too...
-
I've been eyeing the MM-1 for some time for use for wired boom work, but think I could easily wire up one of my Zax TRX900AA's in conjunction with one to do wireless boom with com to boom op via Zaxnet from my Nomad in a pinch with an EA100 earpiece adapter... No comm from op of course except through the mic...
-
I could see my old Vegas being used for exactly these types of functions...
-
Nomad users: What are the specs on your Breakaway Cable?
mastermixaudiomedia replied to Adam Aslan's topic in Equipment
Yep, those are the ones I had. I went on to make another Nomad end and camera end, and 2 each 15' and 25' extensions. All told 12 Neutricons over three days or so... my hands were quite stiff afterward! Also I experimented with drilling the original bushing for the Neutricon... a Q drill(.332" dia.) is the perfect size for CA3PS26 and leaves plenty of material. -
Nomad users: What are the specs on your Breakaway Cable?
mastermixaudiomedia replied to Adam Aslan's topic in Equipment
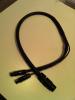
The construction continues. I cut off the two finished Neutricon ends and started a Nomad end(2X TA5F -> OSC8M) and a camera end for a Panasonic AJ-SDC615 DVCPRO camera(2x XLR-3M/XLR-5F -> MC8F) I used a piece of Coleflex to encase the L/R and had to drill out the TA5 cap with a #2 drill in order to fit the two pairs along with it. Taped it back with a piece of gaffer's to keep it out of the way while prepping/soldering. Crimped the shell to only one of the pairs and then trimmed the Coleflex to fit within the cap. The camera end was cake compared to the Nomad end... Finished products at the bottom. Will add a strain relief of some sort down the road to both.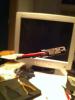

-
Nomad users: What are the specs on your Breakaway Cable?
mastermixaudiomedia replied to Adam Aslan's topic in Equipment
+1. Nice, thanks. -
Nomad users: What are the specs on your Breakaway Cable?
mastermixaudiomedia replied to Adam Aslan's topic in Equipment
Jack, where do you get the part with the D-ring on it that is attached to the cable? Nice touch. I could see one of those on the mixer end as well, attached to the bag. -
Nomad users: What are the specs on your Breakaway Cable?
mastermixaudiomedia replied to Adam Aslan's topic in Equipment
First pair! While painstaking, not particularly difficult... nothing like 3-pin Lemos or 4-pin Hirose! You can see the shoulder poking out of the bushing pretty well here. Will cut these off from the rest of the 200' and work on mixer end and camera ends tomorrow.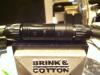
-
I've bought from Dale Pro Audio, ATS Communications, Pro-Sound NYC, and Trew Audio Nashville.
-
Nomad users: What are the specs on your Breakaway Cable?
mastermixaudiomedia replied to Adam Aslan's topic in Equipment
Yep, knew that I was going to get the admonishment to <hat>... which is OK. If the info helps someone else I'm happy... -
Nomad users: What are the specs on your Breakaway Cable?
mastermixaudiomedia replied to Adam Aslan's topic in Equipment
After a couple of delays(Remote Audio CA3PS26 being out of stock, and my Purchasing Dept. at work misplacing the PO... 3 months!) and the parts sitting around, I got 200' of the CA3PS26 cable from Trew Audio Nashville. Totally psyched... started to lay out the situation when I ran into a roadblock: The diameter of the cable(approx. 8mm) is larger than the for the Neutricon SR8 strain relief cap... damn! Figured that this is the cable and connectors that Remote Audio uses for their breakaways, what's known as a "no-brainer". Hmmm. So what to do... First thought was to drill out the SR8 screw-on cap. May have worked but after waiting this long to assemble the parts, I decided to look at an alternative method. Went back to the Neutrik docs and looked at the alternate strain reliefs, the SR8A and SR8B. These are designed to crimp onto a cable rather than use the plastic toothed strain relief insert that the SR8 uses. The diameter ranges from 3-8mm. Decided to get the SR8B's, ordered up a batch from Mouser. Got the SR8B's and unfortunately they would still not be able to crimp the cable, but with a bit of work I was able to fashion a combination of the SR8B cap and the SR8 strain relief for a working solution. Started by pulling off the SR8B rubber boot from the cap. This cap has a larger diameter hole than on the SR8 cap which the cable would easily fit through. There is another plastic piece inside the cap which I would describe as a large shoulder washer. The cable fits through the "washer" but is quite snug, so I removed it. I did not use the metal crimp or plastic insert parts from the SR8B kit. I then did a test fitting using the toothed strain relief from the SR8 and the modified cap from the SR8B. Though a tight fit, the cap can be screwed down onto the SC/MC8 connector shell. Another problem arose however… there is some play between where the strain relief seats in the connector shell and the cap, allowing it to be pulled back even though it is eventually stopped by the cap. So I reinserted the "washer" into the cap and it holds the strain relief properly. A bit of work with a circular file enlarged the washer to a comfortably tight fit and an added bonus, the shoulder on the washer will give a nice finished appearance to the assembled cable end. The strain relief is very snug, should stand up to years of service. So with that hurdle cleared it's time to start making cables! -
Very Gearslutty...
-
This might be a good option as well: AKG Mic Repair I noticed that this outfit was listed on the official AKG Technical Support page(as Land Audio Services)...