Search the Community
Showing results for tags 'DIY'.
Found 21 results
-
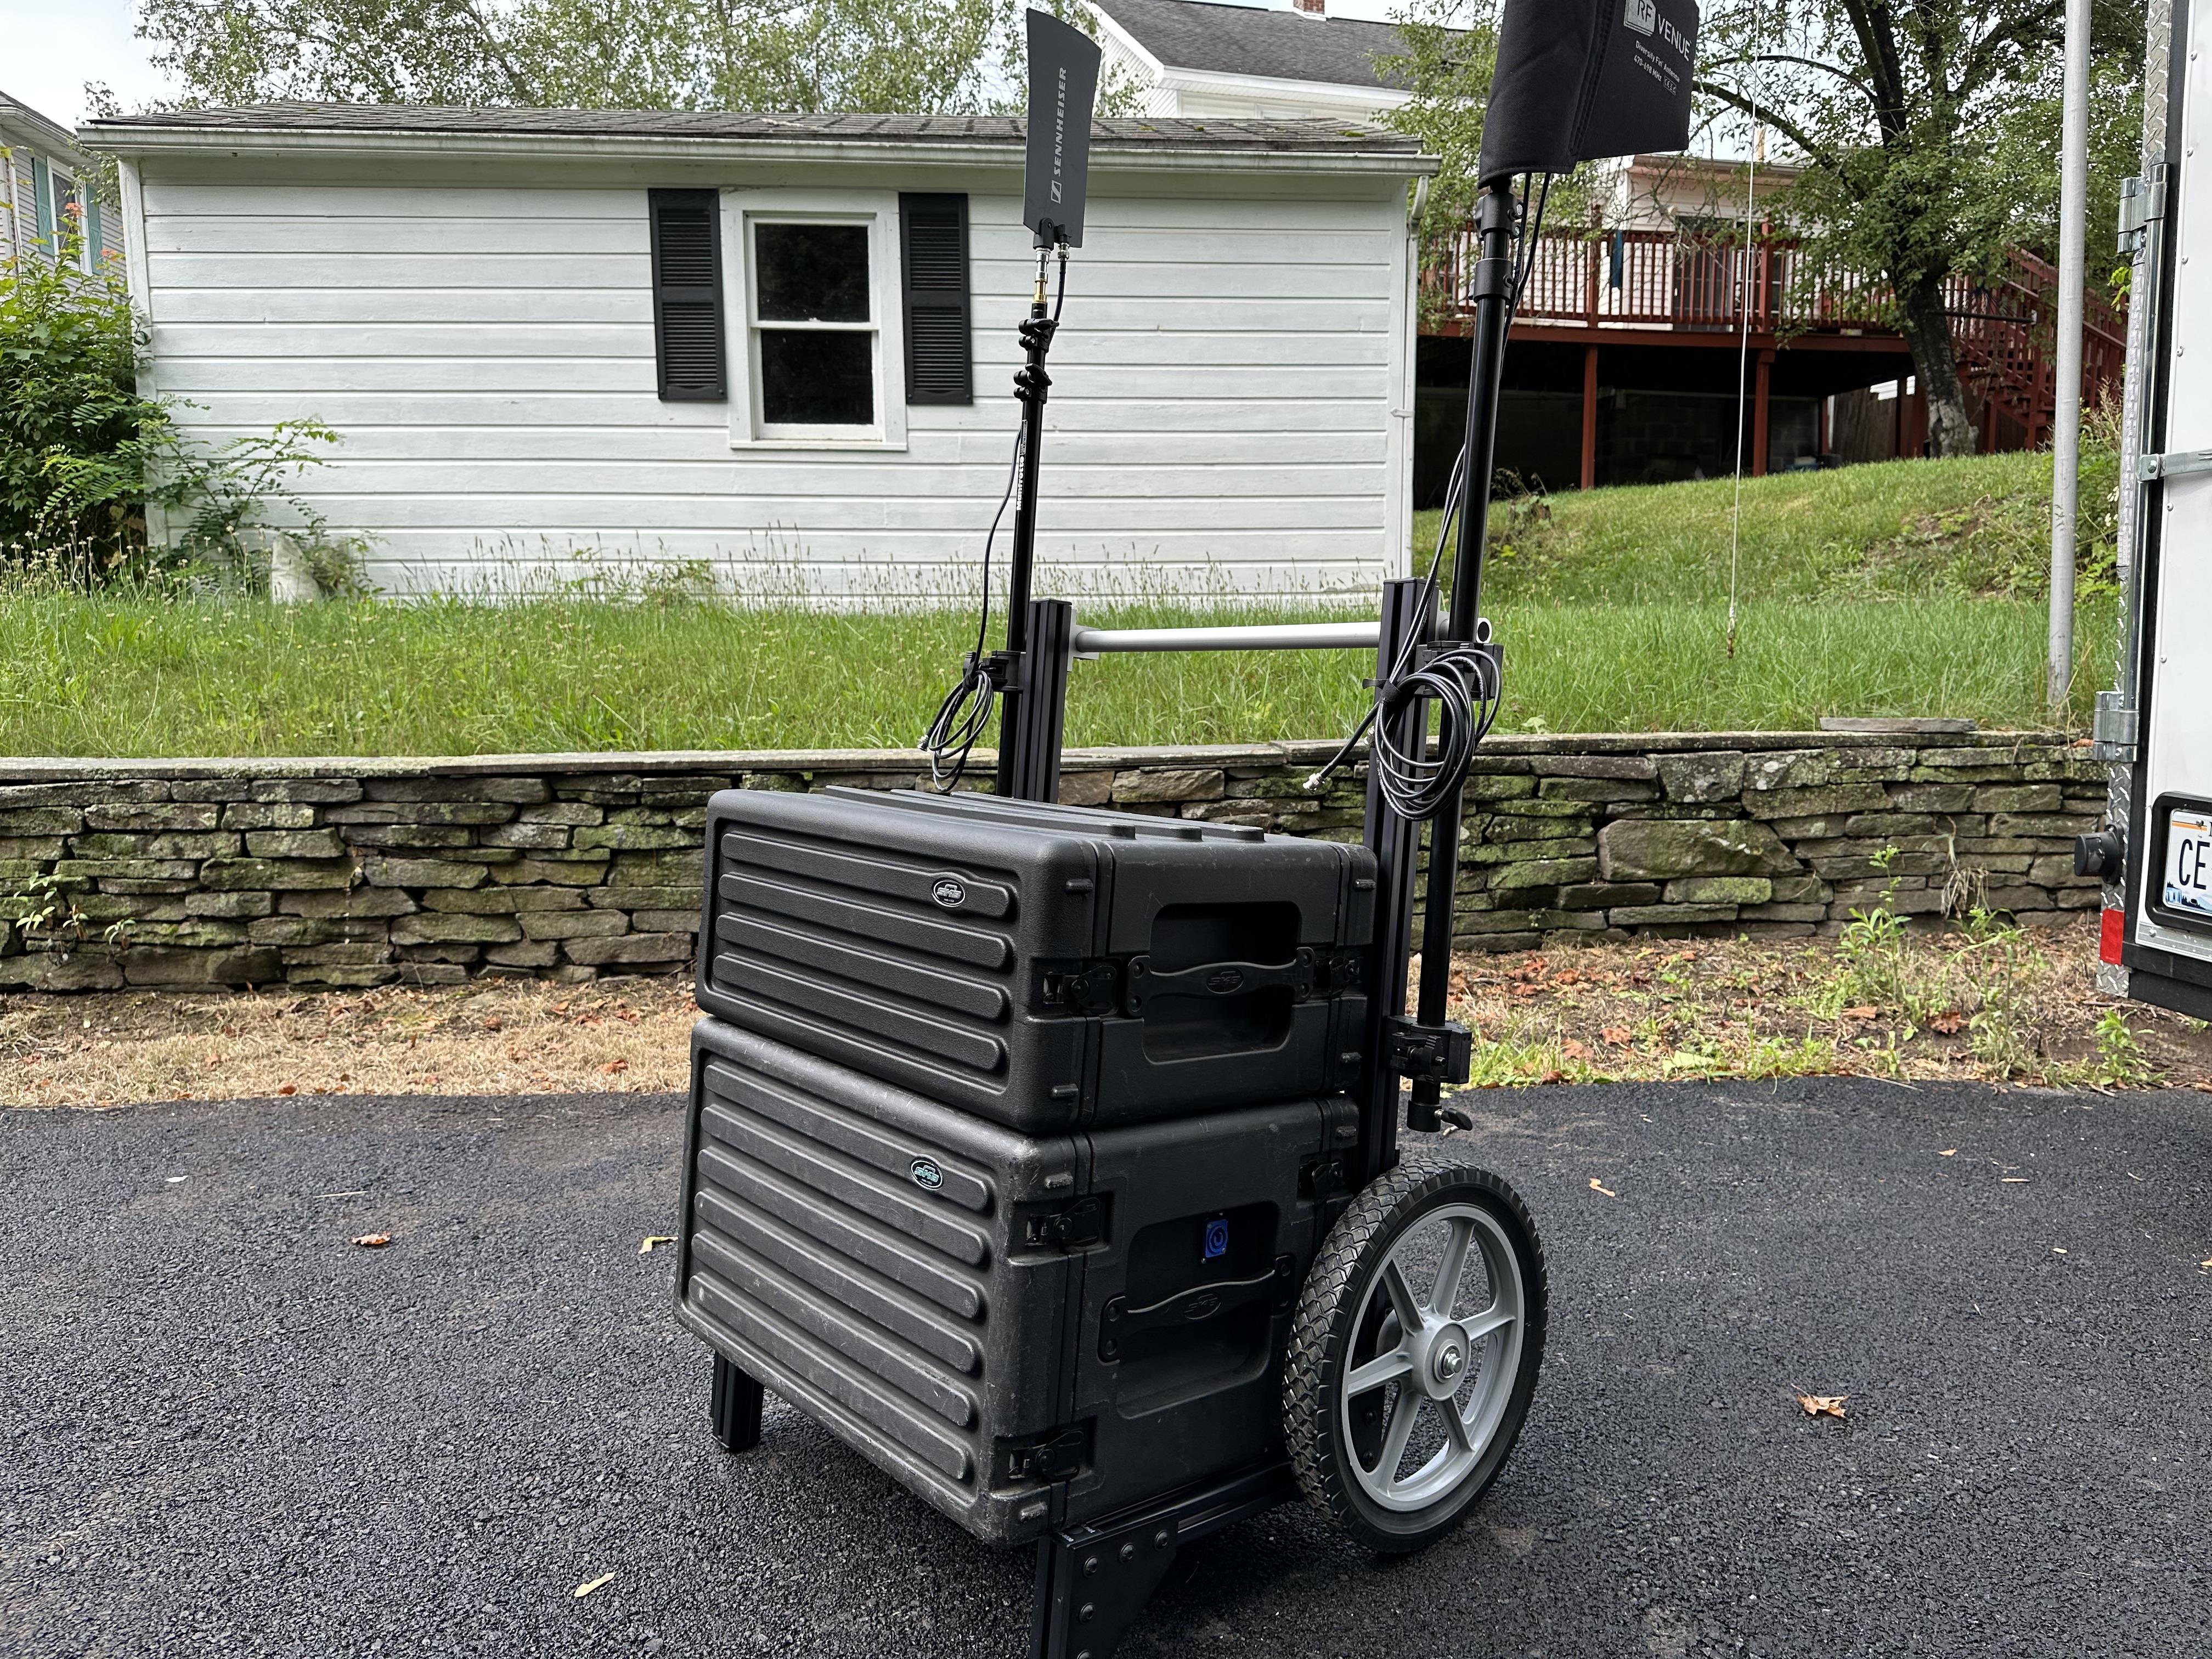
5 years. It's been 5 years since I initially envisioned something unique to get my ceremony gear to where it needed to go. For a while I've been using my R&R or Muver cart, and while it works to a certain degree it would have challenges over more rugged or less hospitable terrain. So I finally bit the bullet, and as some people saw as I was posting the build as it was happening, it all came together pretty quickly. So here is the full lowdown on the cart, where I got my inspiration from, even some of my original concept ideas, right into the current build including a full Build Of Materials for those that want to try this on their own. https://djlou.tech/diy-big-wheel-8020-ceremony-cart/

-
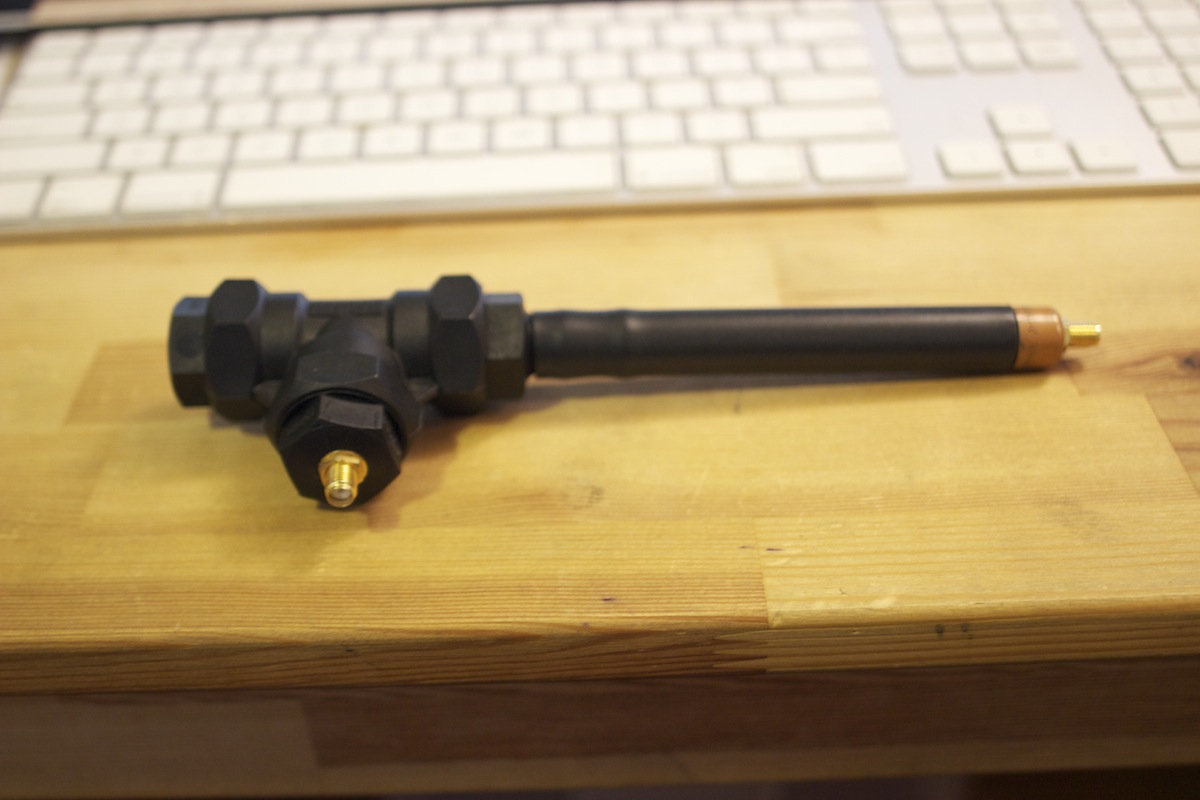
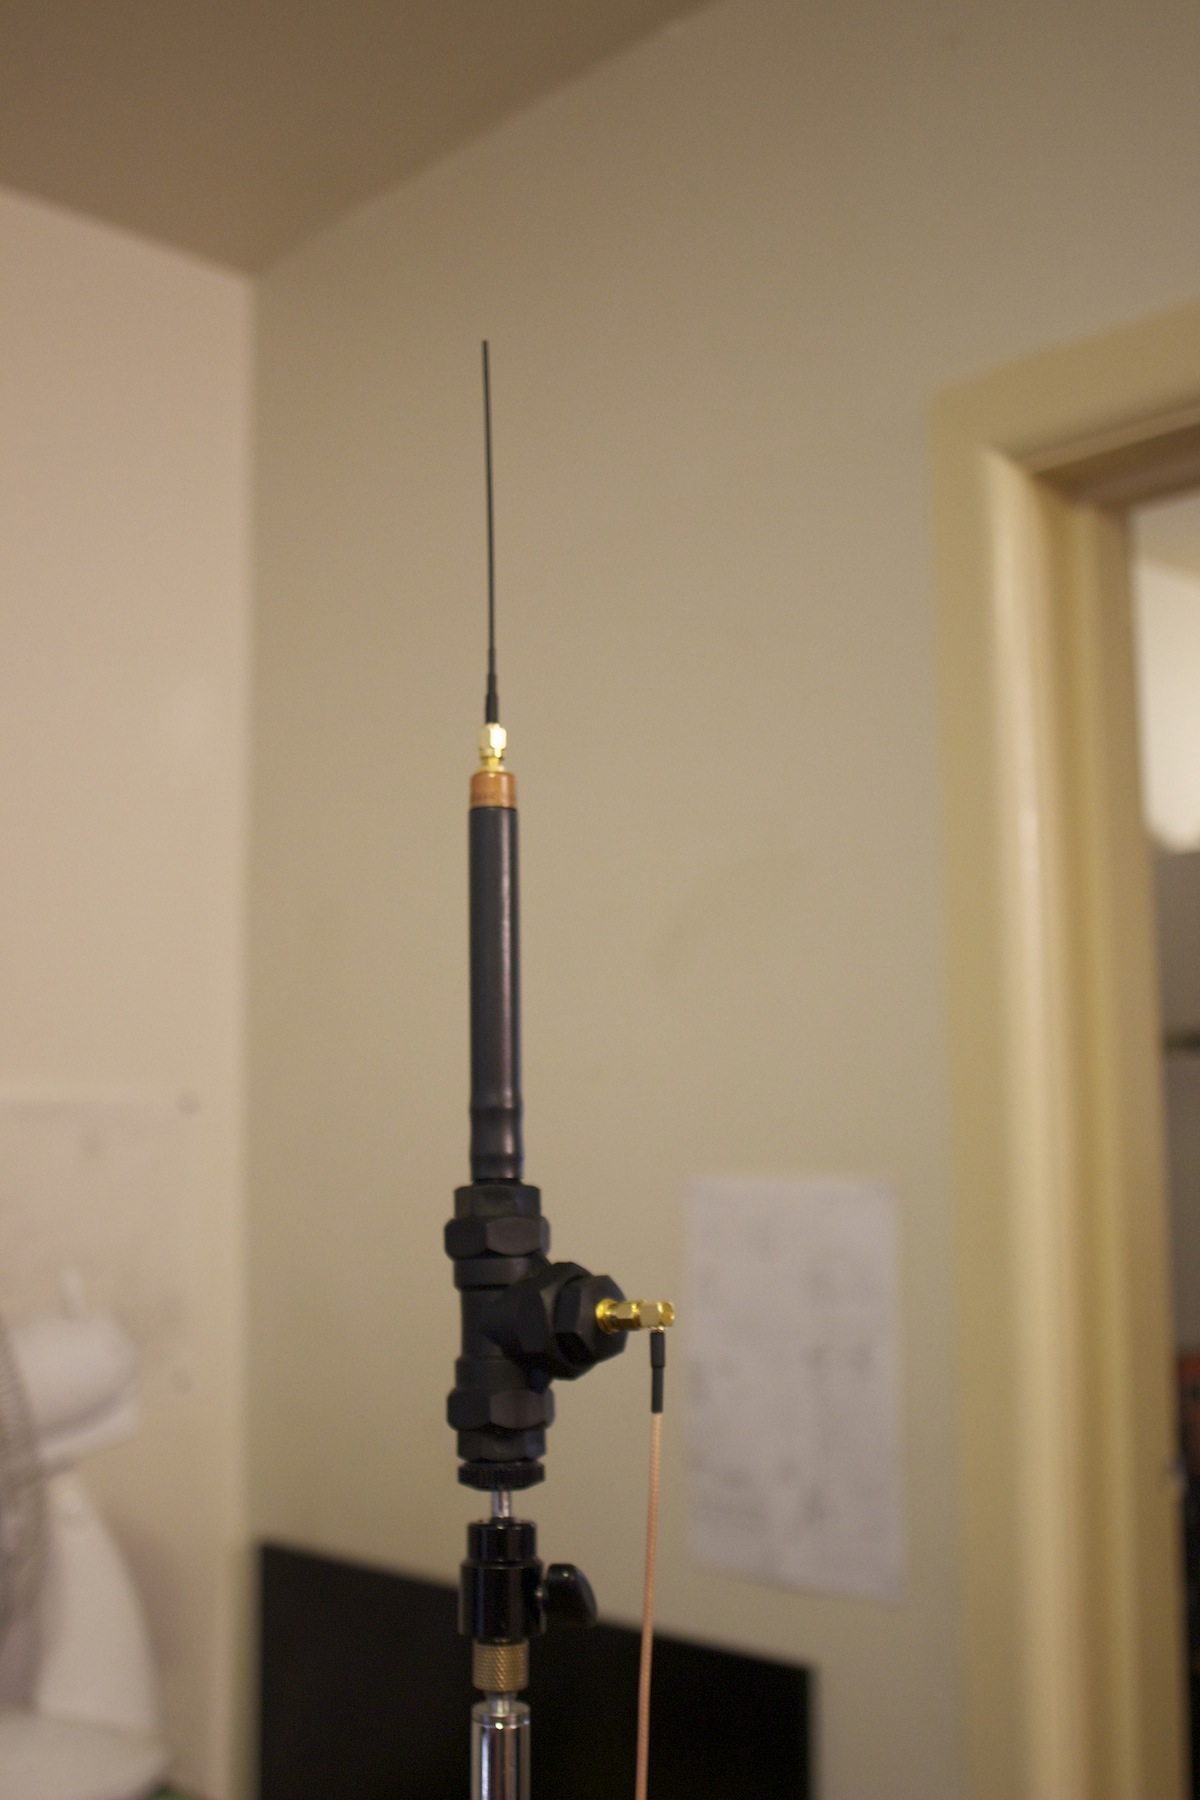
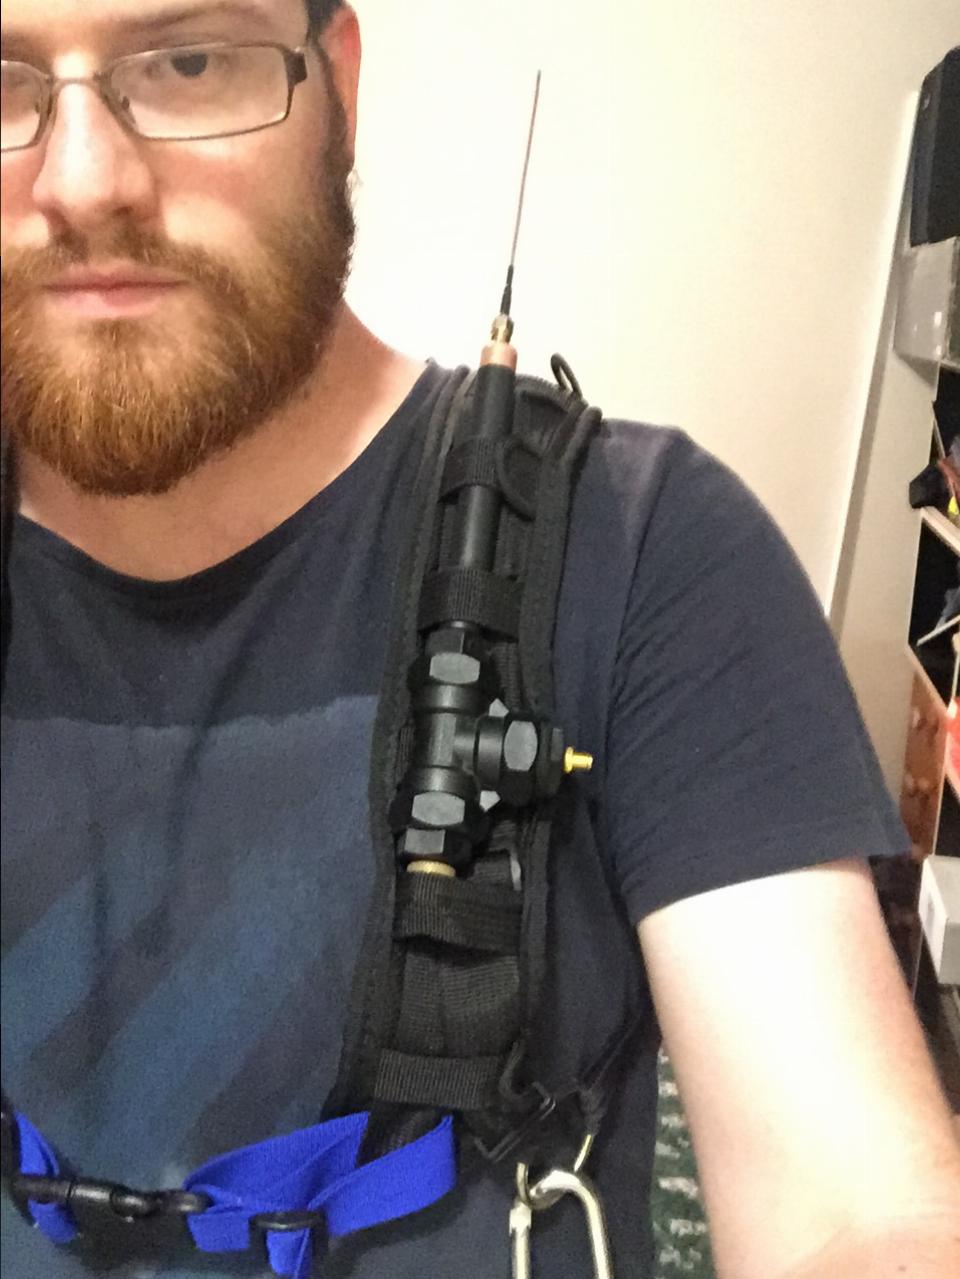
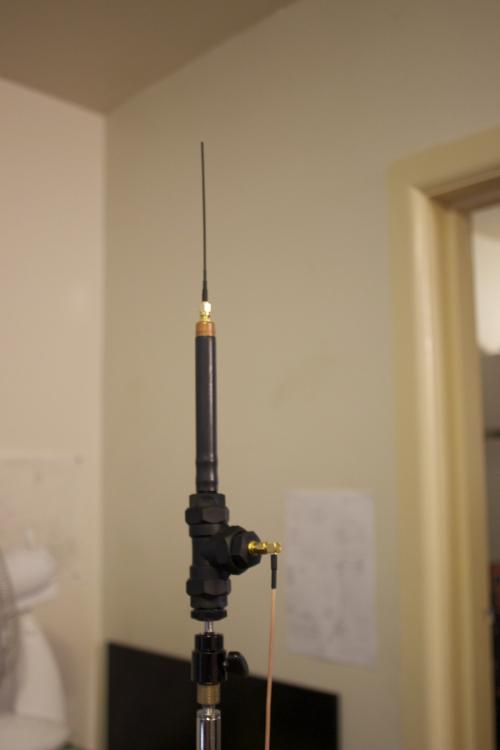
 Hi folks! I'm a bit of a hardcore lurker here, and while I read much, I post little. I'd first like to commend everyone for maintaining such a fantastic community and resource for soundies everywhere! I've learnt (and continue to learn) so much from here. One thing that someone said (can't remember who) but it really stuck with me, was that in this day and age a good production mixer needs to be as knowledgable as possible about RF, and so I've been researching as much as possible and trying to come up with ways to improve my professional practice. One day soon I'll own a full Zaxcom rig to go with my Nomad, but for the time being I'm trying to hone my skills, and get the most out of what I have (G3s). I think one of the most important purchases to further this ethos was an RF explorer, which immediately gave me invaluable real-time feedback on what was happening in the spectrum nearby. I also use the FreqFinder app to help coordinate frequencies and avoid intermodulation issues, and finally have been modding my G3s with SMA connectors to use external antennas / distribution (details are in the topic about this also in the DIY group). I also purchased a bunch of Nitinol super-elastic wire and SMA male crimp connectors and have been making my own whips. So finally to the dipole adapter! I was thinking for a long time about a versatile and easily made dipole antenna (plenty of people make them quickly and easily from coax), but I wanted it to be relatively sturdy as well as compact, and I also wanted to try and have some sort of integrated Balun. I finally discovered the sleeve dipole (which uses a 1/4 wavelength sleeve around the feeder coax as both the lower half of the dipole and also acts as an integrated balun of sorts). So with a few plumbing fittings, some copper pipe and end caps and couple of SMA connecters the 4D mk1 was born! (Dave's DIY Dipole 'dapter). Key points: # - I wanted something that could be mounted almost anywhere easily so there is a 1/4" 20 mounting point epoxy'd into the bottom which fits a squillion different common mounting thingies (pic below shows it attached to a little ball head and 1/3" thread adapter on to a mic stand). # - I made it so that it is an adapter not a complete dipole - you simply screw a whip on the top and suddenly you have a dipole! I've yet to discover the effect of 'tuning' a dipole with only one half of it changing length though... However the parts are so cheap that having several for different 'blocks' would be no trouble - and maybe the thickness of the sleeve half of the dipole would increase the bandwidth a bit? # - It is also pretty easy to attach to a harness (as shown) and the top whip sits above the shoulder for a good LOS to the TXs if they are behind. Finally, I also have heaps of questions and ideas about RF and antennas that I'd like to discuss and share so perhaps this topic could also be a place where people can talk about the sort of things that aren't normally found in HAM radio texts? Cheers!

-
I've had this zuca case for a couple months now and it has worked well when traveling around NYC for small eng and boom op gigs, but I wanted a secure place to put my pole on set as well as give it bigger wheels to better navigate crappy sidewalks. So I finally put some pieces I've been collecting together. Switched out the 4" skate wheels for 8" scooter wheels, sawed off the original front feet and added casters. Attached 2 boom holders on the back using broom holders from the container store (elfa system) and 2" pvc caps protected in the radius of the back wheels.
-
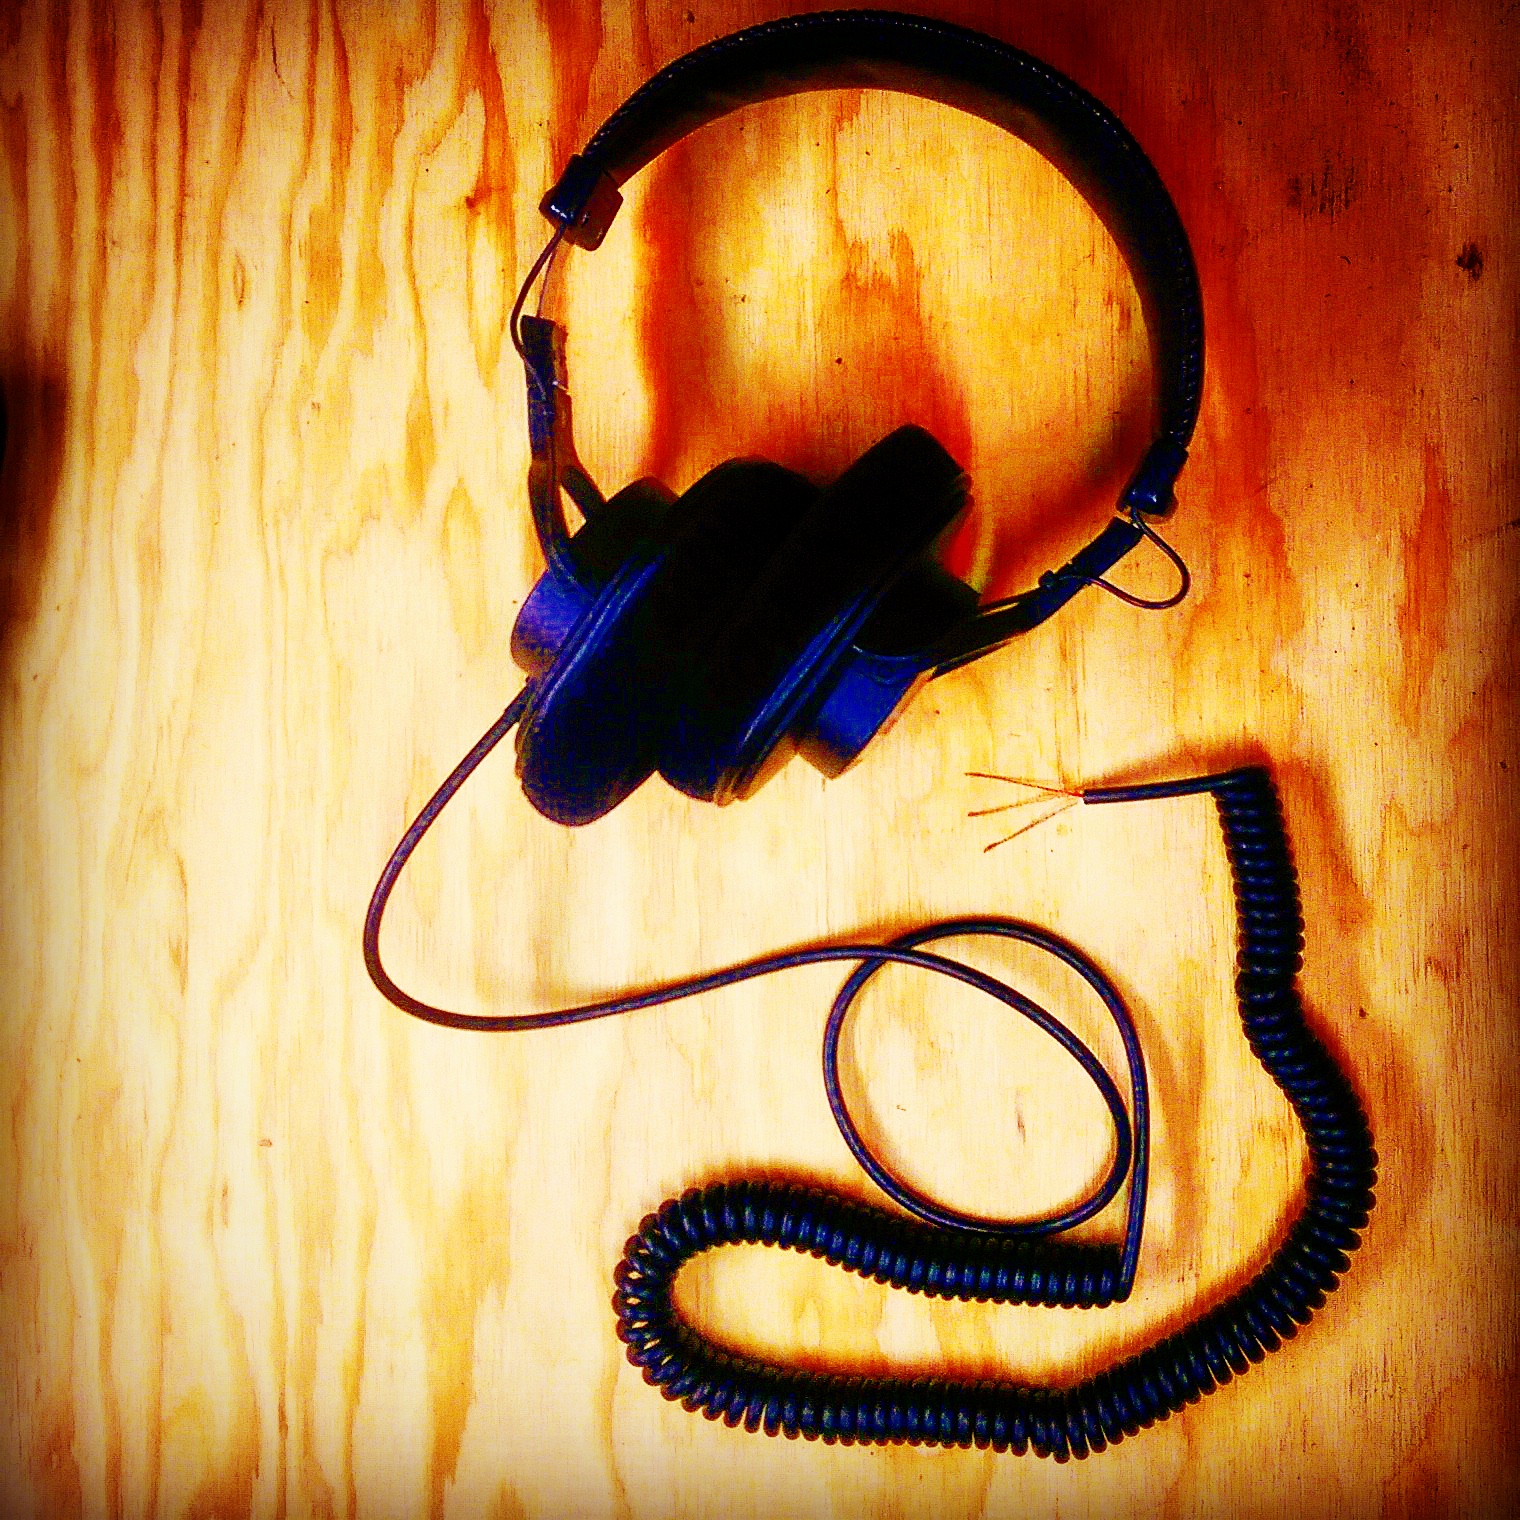
I ended up cutting off a bit more than half of the curly cord. It really helped clean up my bag not having 5 feet of headphone cable dangling from me. I think the 3.5mm female jack on the ear cup is cool, but I wouldn't use it. I don't see any advantage, other than being able to use any aux cable as your headphone input.

-
I was looking into creating a company logo for my upcoming website but can't seem to find the right tools. As my logo I plan to use an image of a random nagra audio recorder spelling out the initials of my name and the service I provide. I've looked into several google searches and all I found things pertaining to photography and video but nothing having to do with our profession. Any information you can provide me with will be very helpful, thanks in advance!
-
I recently stumbled on this DIY electret kit : http://micbooster.com/primo-microphone-capsules/8-primo-em-172-z1.html Out of curiosity I might buy a pair. Maybe the could be usable as plant mics or something alike. Has anyone build one of these already?
-
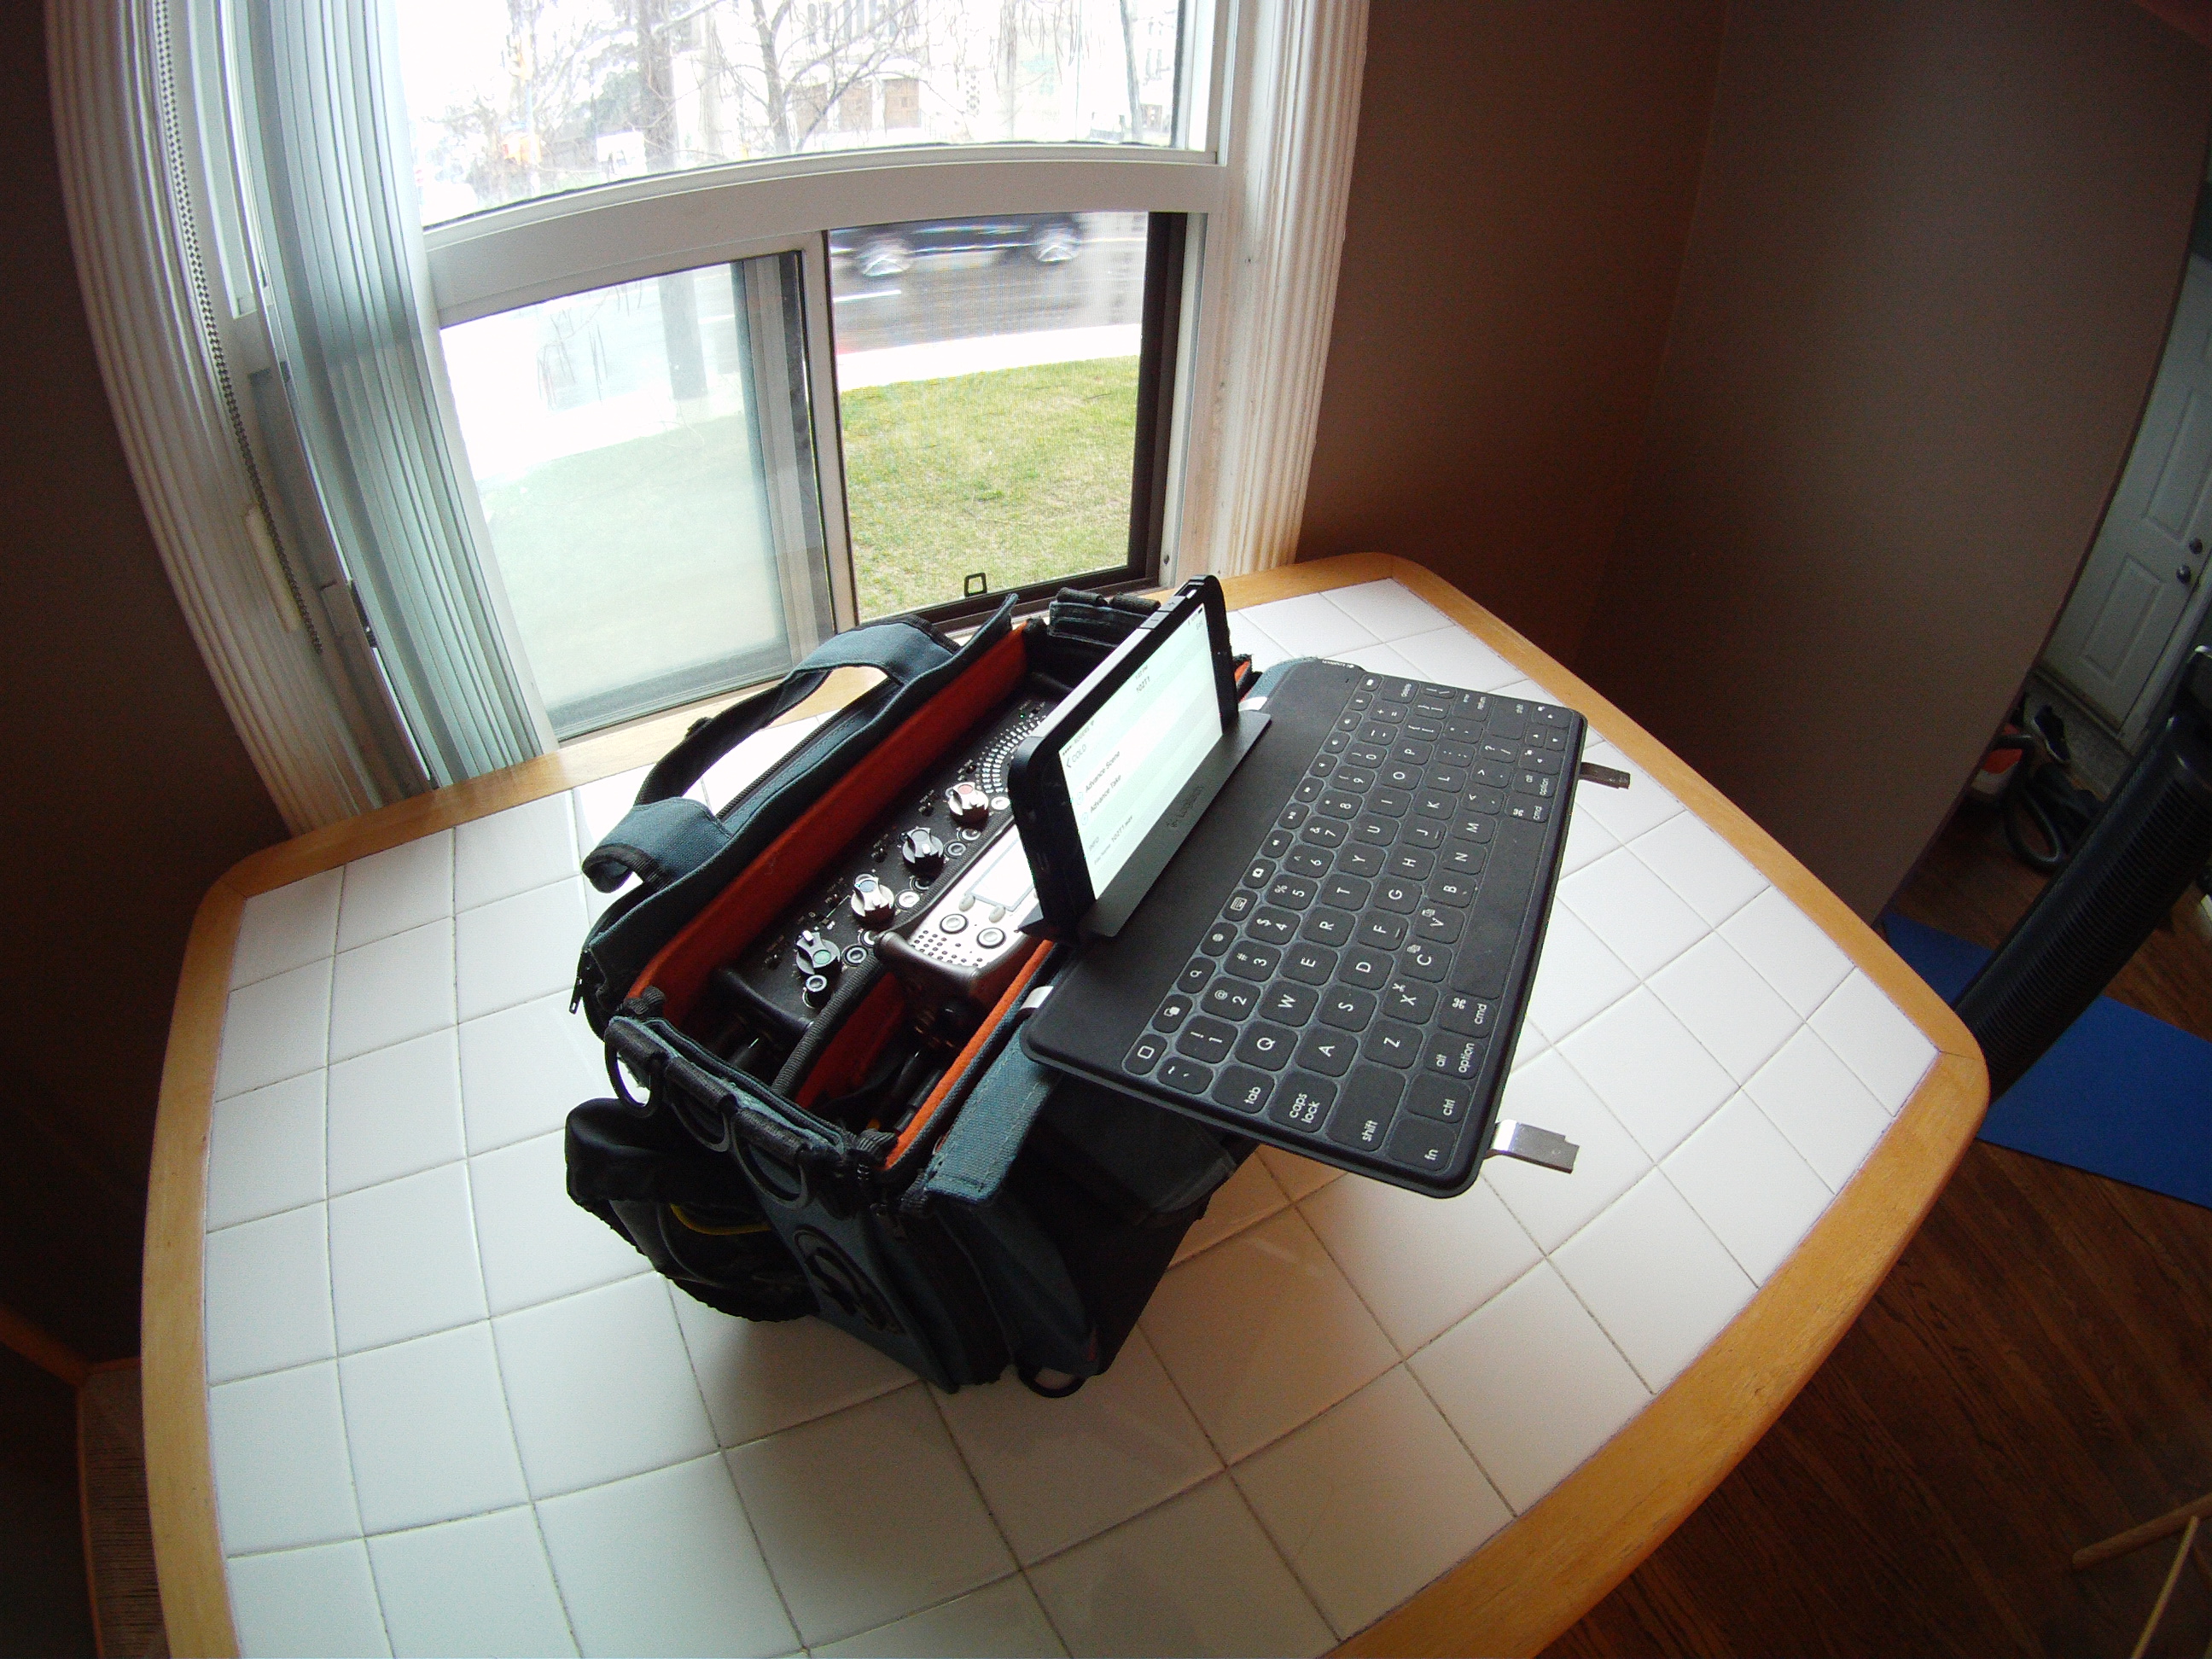
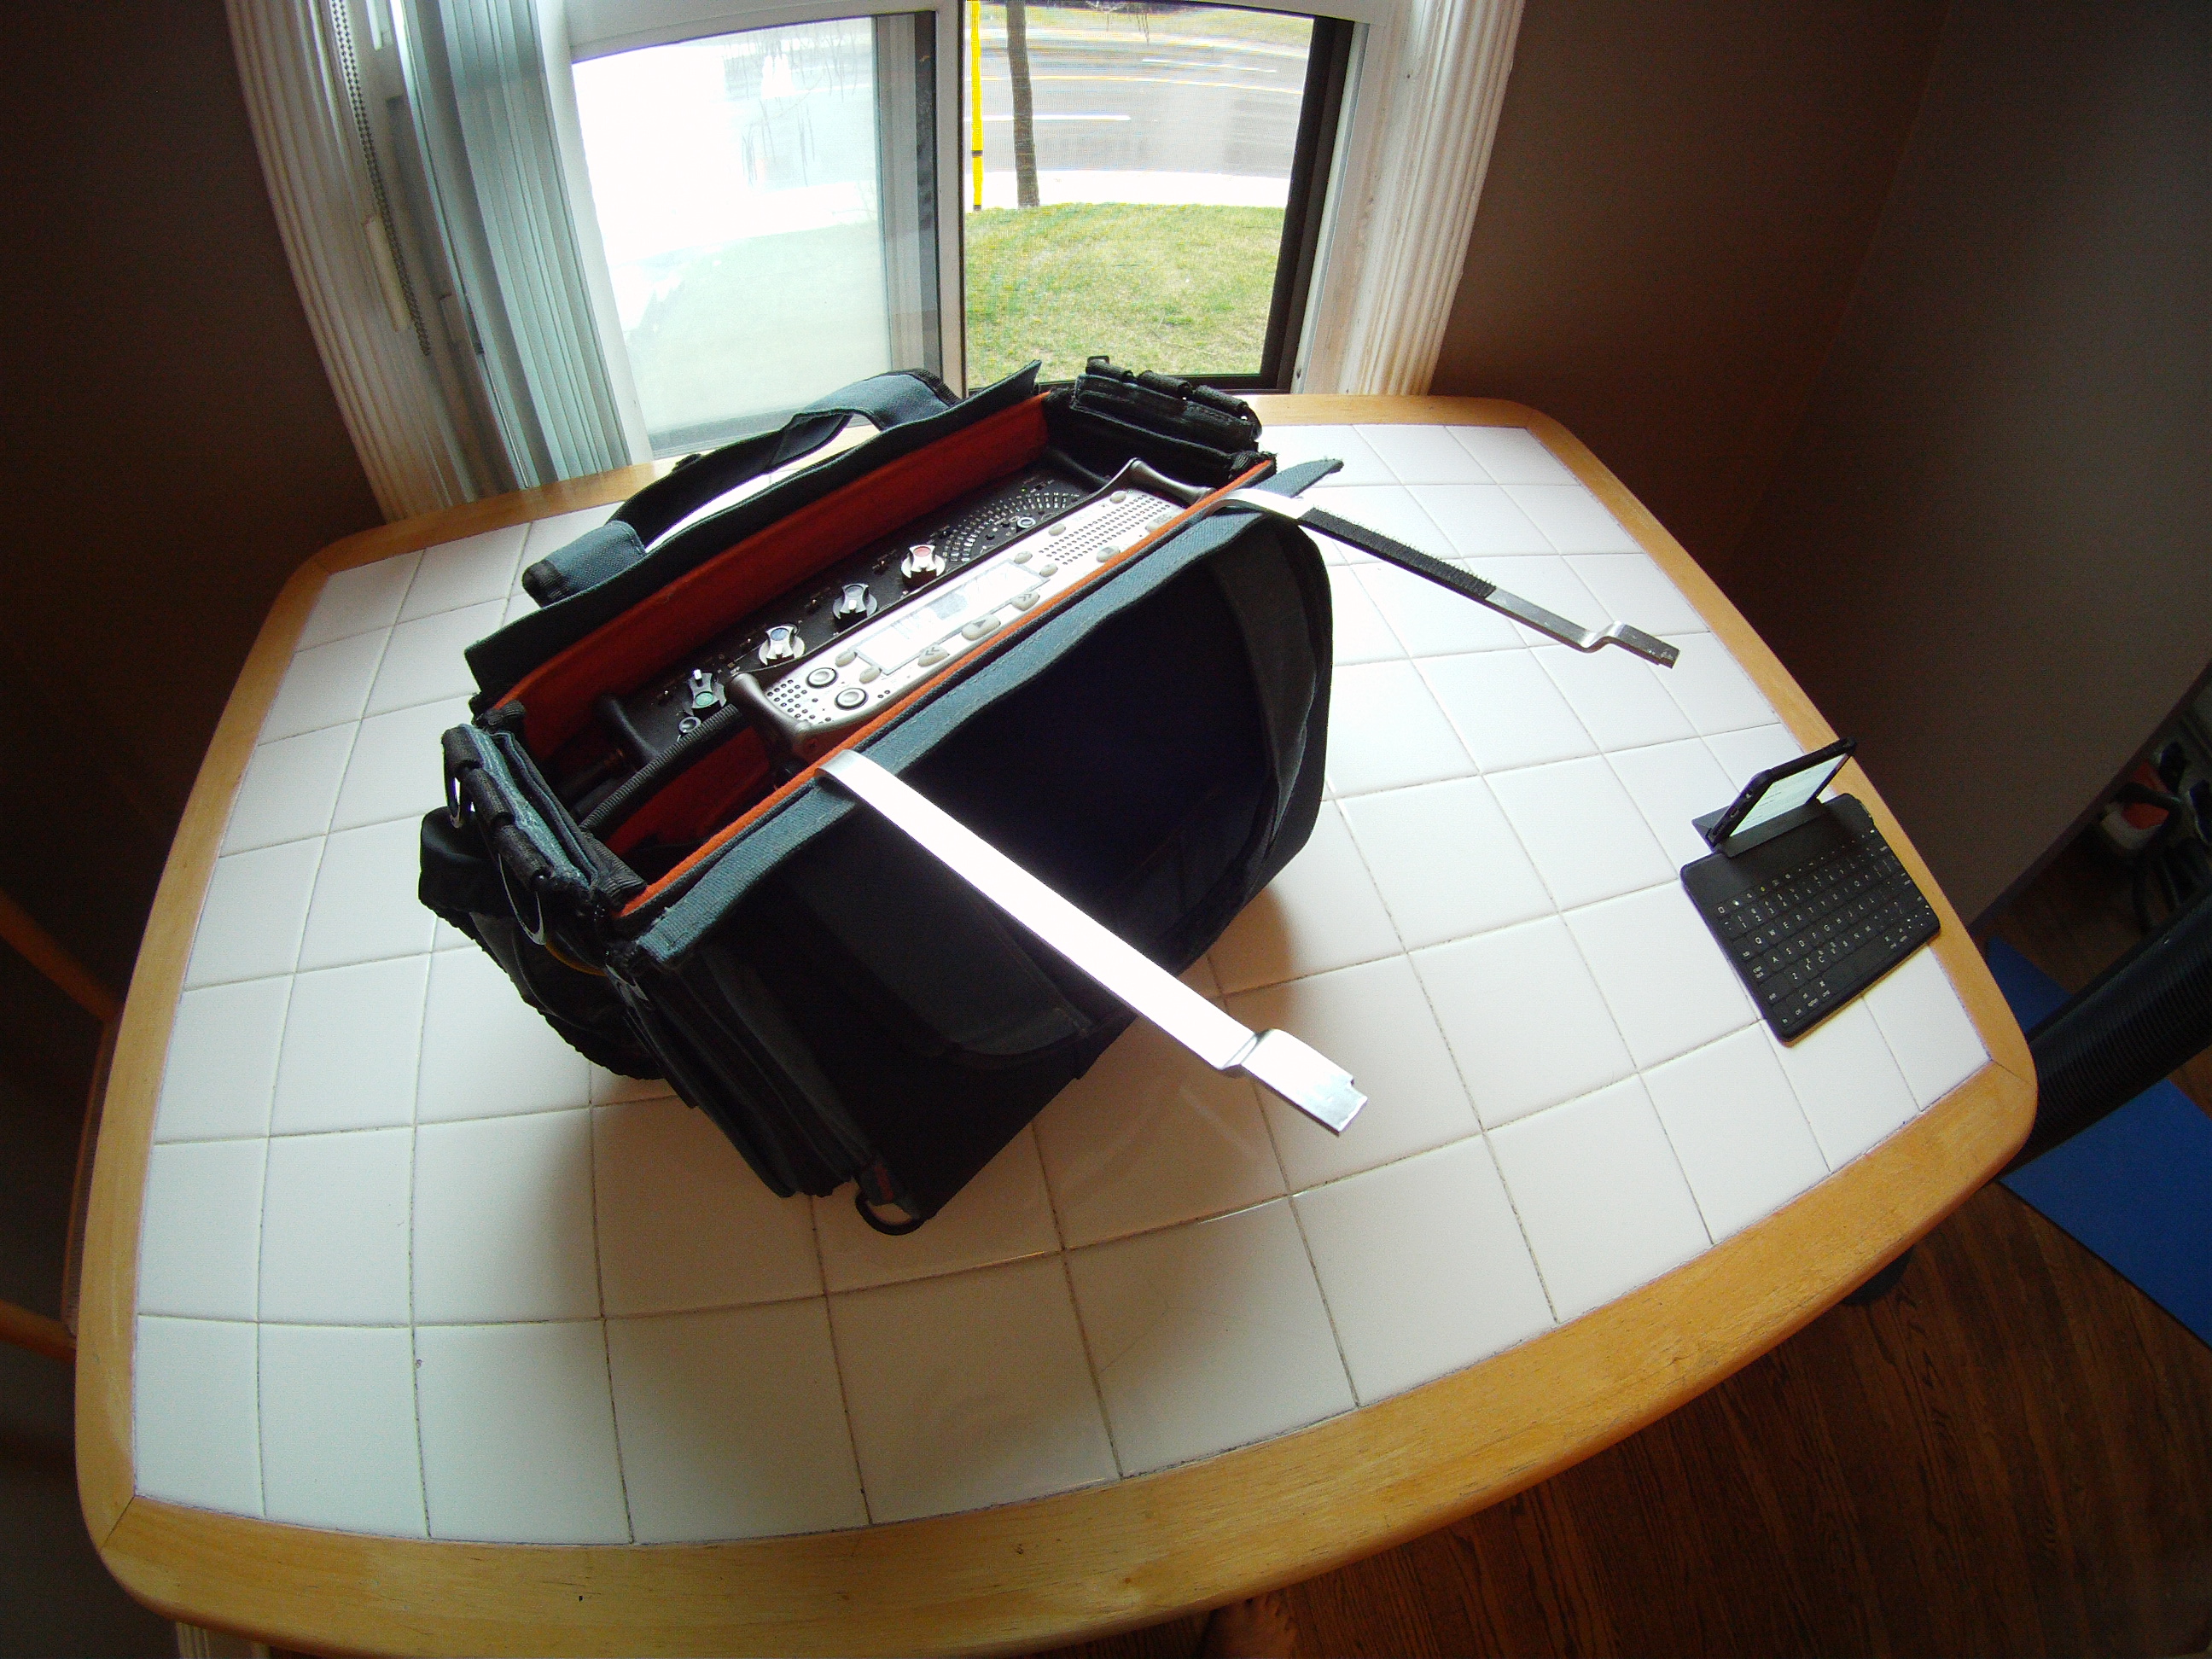
Here are a few pics of a little addition I recently made to my mix bag (Petrol PEGZ-1F) workflow that I wanted to share with all of you. Found this Logitech Keys-To-Go Bluetooth keyboard (http://support.logitech.com/en_ca/product/keys-to-go-ipad) at Best Buy, which has been handy for punching notes into the Sound Report Writer app on my iPhone between takes. The interfacing with iOS isn't perfect for navigating through the app's text fields (I'm hoping to find a way to map out custom key commands to tab around more easily between fields, OR fingers crossed.. this will improve with an app update from Tyler at Inaudible Labs *pokes*) but after some field testing, it's definitely been a more ergonomic and enjoyable option for text entry in more controlled environments, and obviously only feasible when working with a dedicated boom op. I found these random lightweight aluminum rods in my granny's basement, which were originally about a foot long and straight across, with those S-bends mirrored on either end. So I hack-sawed the S-bends off one end of each rod, filed down the rough edges, heated the middle of the rods with my camping stove, and applied some careful pressure to make the 90 degree bends pictured here. I tried super gluing on some velcro to both the rods and the keyboard, but it didn't take too well. The keyboard material has a soft rubber, pleather'y feel. Will be trying again with a different bond soon. The rods easily pop into the velcro seam at the back of the bag for seated/stationary use, or they work fine in the velcro seam up front for when I have the bag harnessed up and walking around. Only minor issue with that is the keyboard gets in the way of the front pocket contents, where I usually stash my lav mounting accessories/tapes etc, but the keyboard pops off the brackets and onto the mixer/recorder no problem for pocket access.


-
So, has 3d printing come to the point yet where we can design and create entire shock mounted and wind protection rigs with various multi mic configurations? I saw a thread a while back that had a person custom 3D printing various mic clips, and it seems like the next step would be to modify the designs that Rycote and Cinela put out to adapt to some more esoteric or compact designs that incorporate both wind protection AND shockmounting. I'm thinking of things like ORTF mounts for longer mics that have shock mounting built in and enough room for cables to attach internally quad rigs rigs with attachment ports for TWO mic stands that can support heavier mics collapsible rigs (rigs that fold down flat and then pop back out into boxes or other shapes) rycote ball gag competitors dual MS rigs etc. The tricky part for all of that stuff tends to be the physical construction of the cage. Once that's designed and produced, its just a matter of wrapping it in an appropriate fabric and implementing the rubber bands for the shock mount. Seems doable. right?
-
Hi Everyone, I am a Sound Editor at a post sound studio in Hollywood, and we are in the process of building a new space. I was put in charge of designing our foley pits, and I don't really have any experience with the design and construction of them. This is a legitimate foley stage, so please don't give me ideas for portable pits. We are going to have one small pit in our ADR room, and then a larger pit for our theater. I have a few questions about the construction of these foley pits for anyone who might know. 1) How deep do the pits need to be? 2) For surfaces like tile, wood, and carpet, do I need dig out the space and pour concrete to put the tile and carpet on, or can I place the tile on the preexisting concrete without digging out the space? 3) I'm assuming the pit is one large hole, but each surface is divided by wood. What kind of wood and how thick does it need to be? 4) What is the ideal size for each surface? 5) I plan on pouring the concrete into a hole that is at least 4 feet deep to prevent it sounding hollow, but is there a way to keep the concrete surface from sound clicky? We aren't going to have a water pit, because there isn't enough budget to add plumbing to drain it. Any help you guys can give me would be much appreciated. -Matt
-
This is a photo diary of the birth of my new sound cart. It is based on wooden 8U 19" cases (bought from Thomann) and will have the option of adding more modules. It breaks into single modules for transport in a car. The base will, apart from having wheels, hold things like comtek RX, small playback speakers, spare headphones, and similar stuff you typically need handy only during set-up. It will also contain small mic stands, LPDAs, and a spare Rycote basket. The main module will hold two drawers with TX, lavs, lav accessories, mics, suspensions, TX batteries and so on, and have 4 units of open space to house RX racks, script, comtek TX, headphones, and similar stuff. The recorder will either sit in this compartment as well, or in a bag on top - depending on the kind of job. In the back will be the power compartment with a power supply for 230V external power and a battery compartment (17Ah lead battery and/or 5.2Ah NP). This module can also be taken on a driving car shoot if necessary (though I prefer having only a bag for that kind of shoot). The modules will connect with bolts (Obi - German equivalent of Home Depot). The front door of the main module can be bolted on top and hold the bag, antenna mounts, and a screen. On the sides will be two boom holders and handles. Here are the parcels from Thomann:

-
hello I introduce myself, I am Mirko, I'm an Italian production sound mix. I ask you a question, perhaps a heresy, has anyone ever thought of making a control surface for Zaxcom Fusion. My idea is to have 8 friends trim and 8 meters (only three LEDs are enough). A controller like a mix 8 without fader which is small enough to fit easily in the sound bag. Thanks. (forgive my english)
-
 So today I had a shoot with 3 Red Epics and I took my lemo 5 TC cable and BNC-lemo 5. But then there was the horror: TC on the Epic body without breakout, seems to be lemo 4 . Aside from Red pissing me off all day, I don't want this to happen again. So I'm trying to find out to make a cable like Devendra did in this thread: But I can't seem to find the schematics for some connectors. I found this: http://www.sounddevices.com/notes/recorders/xl-lb2-wiring/ and http://www.sounddevices.com/notes/recorders/time-code/xl-lx-wiring/ but I can't seem to find the schematics for lemo 4, XLR and different jack-connectors. Any ideas? Did I forgot a common connector?
 -
Hi guys, I want to wire two very short TA3F > TA3F cables to go from the direct outs of my 422 to my 744T. The necessary length is like less than eight inches. It's because the Remote Audio cable I currently use is annoyingly long: perhaps two feet. So my question is what's the best cable stock to use? I don't feel like trashing the Remote Audio cable for this. Rachel
-
I need to make a cable for a Sony WRT-822- Hirose to XLR Male. Can anyone give me the pin wiring for this? Also, if there are any special considerations to take note of when making this cable that would be much appreciated! Thanks!
-
Needed a mic transmitter belt for an actress. Bought some heavy elastan/polyester fabric, large velcro and started the sewing machine. Custom fit!
-
It really made me appreciate a good mechanical engineer. I was quite lucky, not a single drop of blood was spilt, nor a drill or milling bit snapped http://babynetslate....one-a-few-mods/
-
Hi folks, I always thought the Audio Ltd. TX/RX (and Lectro as well) had SMA connectors for the antennae. No I ordered a pack of SMAs for a small antenna distribution DIY project, and these are way bigger than the ones on the RX. Otherwise they look the same, just "zoomed in". Anybody care to give me the exact type of connector? THX in advance Peter
-
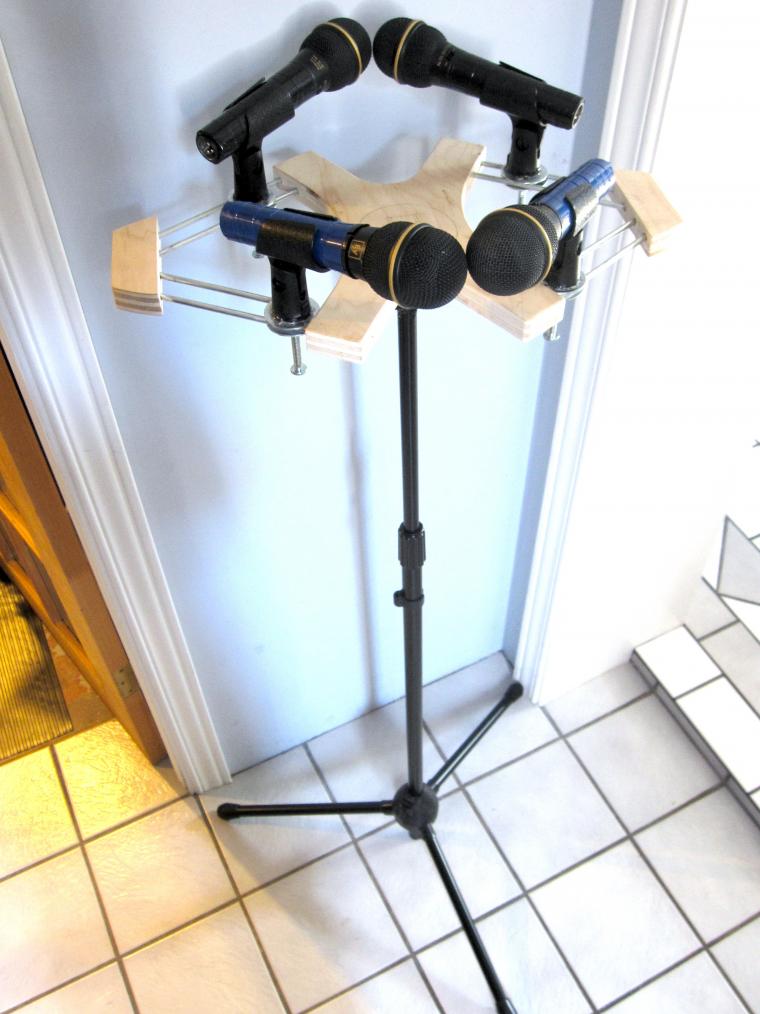
30$ total expenses ( 2nd hand mic stand). BAM!
-
Hi all, I am new here. The only thing I have soldered in the past are straight XLR and TRS cables. I need some assistance in making a new cable. I already have the tools, the connectors, and some spare starquad. I would like to make a cable that is as follows: 3.5mm TRS to (2) XLRf I do not want the cable to act as a splitter. I want each XLRf connector to have a different channel. My intention is to feed a device with ONE stereo input (3.5mmTRS) signals from two different audio sources with XLR outputs This cable will only be 2-3ft. long. My thoughts: The tip of the TRS connector will get pin2HOT from the first XLRf The ring of the TRS connector will get pin2HOT from the second XLRf I do not know what to do with the pin3COLDS from either connector (if anything) Further, do I solder grounds from both XLRf's to the sleeve of the TRS connector? Help me please.
-
I will be recieving my 788t today and a bag and a BDS, my CL8 and CLwifi next week along with 3 more channels lectro SR/SMV and I already have a great boom kit. I will build my bag rig first and then over the next year transition onto a cart. I will continue to post on my progress. In preparation to utility the third season of the walking dead I am building on Trew Audios Video Assist kit. The main difference in mine is durability and use. First off every show I have been on does not need audio from or to the sound cart from video village. We just need video. My system uses the muxlab 500037 to give us 4 BNC inputs/outputs and no audio. I am going to install all this into a nice aluminum box and put ethercon (neutrik connectors for cat5) wall plates on it. I have to thank several folks in the area for their contributions to this design; including Bartek Swiatek and Michael Clarke who have both taught me loads in my time as utility with them. My bag rig comes in today and I will be building my cart over the next year. -Chris
-
Hi all, feeling like making my own brake-out cable and tails to camera. I have little experience with brake-outs and would like to know from more experienced what is a good, comfy distance to insert the multi-pin xlr going to camera. I've seen these measurement from a pro cable maker: Outputs are 35cm Long Return is 65cm Long any advice on the gauge? any extra tips are welcome. thanks